Showing posts with label make ahead. Show all posts

Wednesday, March 7, 2018

Winter 2.0: Time for Chili

Yup, daffodils & snow flurries. 

Remember last week when I was bouncing around in my sandals in the sunshine proclaiming that Spring was here? Well, then March started in like a lion with 50 mph winds and it snowed this morning. 


We should all be used to this already, North Carolina weather is notoriously fickle year-round. There have been years where I've worn short sleeves at Christmas and shivered through snow in my Easter dress. And I guarantee that those instances were met with drastically different weather the days before and after. It's just madness down here. 

So I'm officially withdrawing my Spring pronouncement and cancelling all spring menus until further proof of season-change is provided. I take back last week's bright surf 'n' turf salad and suggestions that you look for fresh produce and instead dive head first into warm, cheesy recipes. 

Let's start with a bowl of chili. 
I recently bragged that I was proud to have found two recipes to claim as my own; one for chicken noodle soup and the other for chili. I was saving my chili recipe so as to not give it away before my church's annual chili cook off; you know, because I was going to win. 

Spoiler alert: I didn't win, I didn't get honorable mention, but almost all of it was scraped out of the Crock Pot when we got ready to leave. It may not have won me another Summit Church title (still proud of being the Dessert Queen), but it is a tasty recipe. 

Chili is contentious. Folks like what they like and they don't want to deal with any nonsense outside of their chili definition. My dad's chili always has mushrooms, J's is made with beef and local sausage, a Texan girlfriend lives for no-bean chili. Up until recently, my chili loyalty went to whoever fed me the most (generally my dad #onlychildperks), but now I can boast a preference for my recipe. It started as a ground turkey chili, but is also good with lean beef; it's made with black beans; and you have to top it with green onions and sour cream. 

Because of my dad's kitchen sink chili - with meat, beans, tomatoes, mushrooms, peppers, and onions - I tend to drift to a chunkier style of chili. Some recipes are more watery (and I mean that in the best way possible) with fewer ingredients beyond meat and tomatoes. That's edging into soup territory for me, so I appreciate that this recipe has lots of bits and pieces and retains a heartiness. Plus, the "secret" or at the very least, unexpected, ingredient - crushed tortilla chips - thickens the liquid further and pulls all the flavors together.
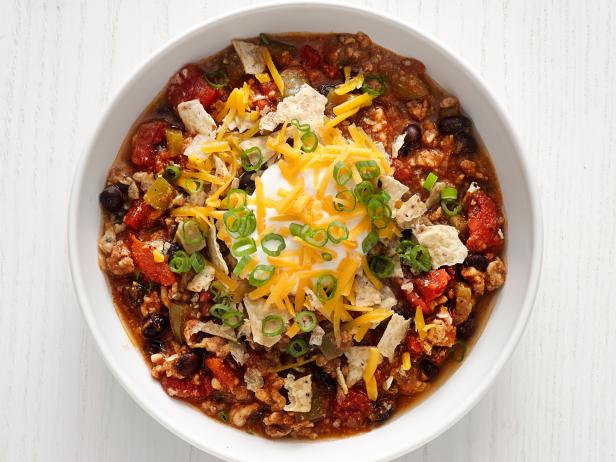
Photo courtesy of Food Network magazine

Food Network magazine, who originally produced what I'm now calling "my" chili, called this recipe "Quick Turkey Chili" and they were spot on. This recipe takes hardly any time and only one pot to prepare. 

Several years ago, I was the Fellowship Coordinator at our church and I had to organize all our monthly meals, including the Chili Cookoff. I remember a lady rushed in right before church started. She'd had a family emergency the night before and was frantically making her chili in front of me. She threw canned veggies, tomatoes, spices (including a Hidden Valley ranch packet?!?) into a Crock Pot, cranked it to High and left it to simmer for the hour-long worship service. And she won. By a landslide, according to our judges. I've rolled my eyes at that performance for years, but now, my recipe doesn't take much more effort. 

First you muddle the tomato paste and spices together to make a really aromatic lump, for lack of a better word, to create a flavorful base. You then literally dump everything else in to cook off (like your raw meat) or to simmer and meld together. The starch from the tortilla chips acts as a binder and pulls everything together as it simmers. Then you add a punch of flavor with some extra green onions. It couldn't be easier. Unless of course it was... but you have to be extra thoughtful in your grocery shopping and meal prepping. 

As you may know, J & I are on different work schedules which saves us a bundle on day care costs, but also means we have to be incredibly organized in our meal planning for everyone to eat healthy, homemade food. To do so, we plan out a week's worth of lunches and dinners and make one big weekly shopping trip (goal: bi-monthly or even monthly shopping excursions). We peruse sale papers; make monthly trips to a bigger city to hit Aldi, Trader Joes, and/or Sam's Club; and try to get the best deals on what we think are smart purchases. We try to stick to our weekly lists, but especially on our monthly Asheville trips, we'll stock up on items that are on a good sale or we know we'll use.

You have to be smart and think big picture. If peppers are on sale [often Aldi will have them for $1.50/3-pack (even the more pricey colored ones!)], buy several to bring home, dice, and freeze in one-pepper-portions for later. In dishes like chili, peppers will be soft anyway, you don't lose any texture by pre-freezing (and you won't need to thaw them, either). 

Also, this recipe (and most soup recipes) makes around a half-gallon of finished product. I divide it right away into freezer-safe quart containers (these are 50 cents each at Dollar Tree or use freezer bags and lay flat on cookie sheets in the freezer, then you can stack them like books!). One quart usually feeds us for a lunch and dinner apiece (plus a baked potato) and I can immediately freeze the other quart for later. 

If you think making this chili is fast, you won't believe how fast it is to just thaw a quart! 


Saturday, October 1, 2016

Wholesome - But Quick & Easy - Breakfast

First, thank you for humoring me and my very infrequently updated blog. Momming ain't easy and blogging while momming is near impossible; I appreciate your patience and long attention span. Don't give up on me!


Sunday, September 28, 2014

No Nonsense Chicken Enchiladas

You all know that after flavor, ease and expense are my highest priorities in food. And since we bought our house and moved, that has never been more true. Our kitchen is the only room that is unpacked and remotely functioning; but we are still scrambling to find all our utensils and have been slack grocery shoppers. With that being said, dinners have been quick and easy, and usually come in a bag - but I took the opportunity this weekend to cook a real meal, and make several meals for later, to be kept in the freezer.

A great way to save money, is to scour your grocery store for "reduced for quick sale" items. This is especially handy with packaged produce, like mushrooms and lettuce; dairy items and the biggest savings are in meat. If you're an astute shopper, you can easily figure out which days are flagged for restocking and reducing current inventory. Our favorite local store, Ingles, puts bright stickers on produce and bulk items and that's the first thing we look for. Grabbing deals like this can be hit or miss, and sometimes on impulse rather than need alone but they're real steals! Be especially mindful of items that freeze or dehydrate well.

The other day, I went to Ingles to get some breakfast items, and I walked past the meat cooler where almost three pounds of chicken thighs were on sale for less than $2. Did I need chicken thighs? No. But, I brought them home, cleaned and repackaged them in two-portion airtight containers and threw them in the freezer. I later used a pack for last week's chicken panang curry and thawed the remainder to make two batches of these chicken enchiladas.

With meat already on hand, the rest of the items are staples in our home, so this recipe is incredibly inexpensive and would be easy to make on a whim, too.

Since you're making the roll-ups yourself, this is a very economical way to make individual servings, servings for two or a family. I doubled the recipe, which normally makes eight enchiladas or four servings. But instead of making two batches of eight I cooked in a smart way that would give us the most meals with the least amount of waste - one batch of eight for when we had a couple of friends over and two batches of four that we could eat ourselves; we ate one 2-person batch that night and I froze the other 4-pack and the 8-pack. Eight servings or 3-4 meals for under $10!

I love that these enchiladas are hearty but without feeling heavy or over-dressed with cheese or sauce. I chop my chicken into big, rough chunks, which gives the filling a thickness and great mouth feel as opposed to some saturated with sauce and runny filling. The green chiles add a mild heat and sweetness and the cumin adds that traditional "taco" flavoring we all love. You could easily dress this up with more spices or even some roughly chopped cilantro (which I despise). Also, you can add other vegetables to the filling; the Progresso soups include black beans but if you had some extra sweet corn kernels, kidney beans, sauteed onions or mushrooms (look in your fridge for leftovers or the reduced section of the store) you could add 1/2 a cup or so to the filling, too!

The recipe only involves mixing up two different bowls of ingredients - one for "sauce" and one for filling, and actually rolling the enchiladas. It's that simple, which makes this a great recipe for little helpers. If you chopped the chicken, this whole dish could be made by your children. How much would they enjoy eating something they'd made?

I hope you're able to incorporate this meal into your own fiestas and family dinners!


Chicken and Cheese Enchiladas

Ingredients:
1 can (18.5 oz) Progresso chicken enchilada soup or southwestern vegetable soup
1/3 c sour cream
1 can (4.5 oz) chopped green chiles*
1 t ground cumin
2 c chopped cooked chicken
1 1/2 c shredded cheese
8 flour tortillas (corn works, too)

Method:

Pre-heat oven to 350. 

In a medium bowl, mix soup, sour cream, chiles and cumin. Pour 1/2 c soup mixture into ungreased 2 quart casserole dish for full serving (use smaller dishes if making smaller, freezable portions - 2 enchiladas per person). 

In another bowl, mix 1 c soup mixture with chicken and half of the cheese. 

Place 1/4-1/3 c chicken mixture in each tortilla. Roll up and place seam side down in the baking dish. Pour remaining soup mixture on top and sprinkle with remaining cheese. Cover dish with a piece of alumninum foil sprayed with nonstick cooking spray. 

Bake 30 minutes, remove foil and bake 5-10 minutes until cheese is melted and bubbly. Allow to rest at least 5 minutes before serving. 

If making to freeze: Only par-cook the enchiladas, about 15 minutes. Cool to room temperature then wrap with plastic wrap and foil to put in the fridge. When you want to cook it, pull it out the night before (so you'll have less reheat time) then cook at 350 for the final 15 minutes.

*You can use the canned green chiles, or roast your own if you have fresh peppers on hand. Green, sweet or red peppers would be good, but if you want to add heat add jalepenos or even something hotter! Toss your peppers on a baking sheet and place in a 500 degree oven. Cook until the skins are wrinkled and getting dark. Remove from the oven and throw them in a zip-top bag to steam, this will help the skin peel off, Rub them gently to remove the cooked skin. 

Sunday, July 20, 2014

Life-saving Meals: Homemade Frozen Food for the Sick, Shut-in and Overwhelmed

Last week, we welcomed the newest member of our family to the world. Miss Zayleigh, our niece, was born on July 11 and both her and momma are feeling great.

Amanda, Zayleigh and Jordan
But despite her having all her fingers and toes and being quite possibly the calmest, quietest little bundle of joy I've ever seen, we knew her parents were in for a long, exhausting week. And as we discovered while planning our wedding, when you're stressed and tired, the first thing you feel like giving up on is cooking good meals. We certainly ate our fill of take-out, pre-packaged junk in the lead up to our wedding (six months ago, already!?!). So, J and I took a few hours and less than $30 to make a bundle of goodies for the family to eat.

Food gifts can be such a blessing to a family in need. As Deacons at our church, we're constantly asking folks undergoing surgery, loss or hardship if we can set up meal deliveries. And while any donation of food is a great gift, by saving money and time; home cooked meals that the recipients can eat on their own schedule, without guests, are so important.

Our menu for the new parents included:

All of these recipes were simple, relatively inexpensive (including the sides or "add ons") and will be delicious, wholesome meals for their family.

And a hidden benefit of delivering frozen meals, is that most recipes are for two whole portions or are easily doubled. So, if you know you'll have a need for some heat-and-eat meals in the future (for yourselves or others) you can easily make a dish for dinner and have the second portion frozen for later. This is great if you know of someone who will be having surgery soon, has a baby due in the near future or you're preparing for a busy back-to-school month or the beginning of sports season.

Because of the ease of making several portions to freeze at once, we love to cook freezer-friendly meals throughout the year and keep extra portions on hand. For ideas on other freezer meals, click here or visit the "freezer-friendly" label to the right. 

I'll be sharing more on the dishes we made this week (especially my mom's millionaire pie recipe) but for now, I want to share some food delivery tips and dish on the delicious french toast sticks.

Here are some tips for when you prepare and take meals to someone in need:

  • All but the french toast sticks were self contained in aluminum foil pans with plastic wrap or foil. It's important to try to limit the dish washing for your recipients; and that age old argument of "Where's that casserole dish I loaned you? You never gave it back!" It's even thoughtful to include a pack of disposable plates, cutlery and napkins in your delivery. 
  • All of the dishes we prepared take little more than refrigerator thawing and reheating (except for the pie; nothing to do but eat it!). I think bringing things they can cook on their own schedule is important. They won't feel like they have to eat with or in front of you while you visit and if they have a new baby, for example, their meal schedule may be all out of whack. Bring things that give them some ownership over their meals, and will help make their houses smell good - the French toast certainly does!
  • Include precise directions, written on the package, if possible. I wrote any thawing and prep instructions on the pan lids or bags with permanent markers. 
  • Plan ahead. For your sanity, and theirs, plan ahead. Make sure you know of any allergies and if you're part of a meal delivery group, communicate - so the family doesn't get five lasagnas in a row. I remember when we've had meals delivered to our family, usually after a death; it's a sweet, but monotonous train of casseroles. Talk with your fellow meal-makers and schedule some variety. 
  • This may also be a veering away from one-pot casseroles, but think about the whole meal experience for the family. Try to include sides or add-ons that the family would enjoy with the meal but might not have on hand. And again, try to branch out - step away from bagged salad and cookie dough. 

Now on to the French toast.


I love French toast, but we rarely eat it at home because 1. we rarely have a lot of bread readily available, and 2. y'all already know that I hate mornings and I especially hate cooking in the morning. But this solves all of my problems.

First, French toast can be made with almost any bread and one of the tips of this recipe is to save your bread ends, leftover hot dog buns (why 10 buns but only 8 dogs?!?!) etc. in the freezer and then make French toast sticks when you've saved enough. Also, discount bread is pretty easy to find. Our Wal Mart has a "old bread" cart in the bakery for the discounted goodies that are a few days past their prime. I was able to score two huge loaves of fluffy French bread (so this is French French toast, thank you) for only 70 cents each! And a local bakery has a "happy hour" on their last work day where everything's half-priced. That's inexpensive, locally sourced bread! Win!

Secondly, these sticks don't require any thawing time and can be popped straight from the freezer into the oven and cooked in around 15 minutes. So, if you throw them in the oven, you'd have time to get ready while they cooked on their own. And, because I miscalculated my snooze button again (don't tell J), I was able to do a test; turns out they travel well too! I put them in a tupperware, drizzled on the syrup and ate them on the road - no more dangerous than a McMuffin (but more flavorful and budget friendly).

Too often, I think French toast can be soggy, flaccid sticks that soak up syrup like a sponge and aren't of a particularly pleasing texture. But with the crunchy cereal coating(and the crust of the bread I used), these sticks are crispy and stand up to the syrup. I used our Ninja food processor to pulse the cereal to get some very fine pieces and some larger chunks; you can customize your crunch-level with how finely you grind the coating.

The flavor is pretty classic, warm cinnamon and vanilla pair so well with fluffy bread and syrup. It reminds me of being a kid and waking up on a Saturday morning to someone already cooking. If only I could watch cartoons at work. And you could really go anywhere in customizing the flavor, too. Adding some pumpkin pie spice or cloves and nutmeg would make this even more autumnal. Or you can use different cereals. I ran out of cornflakes in my second batch, so I used crushed rice Chex and Special K honey and granola. I recommend straying away from the super-sweet cereals, or pairing them with a more simple flavor, since you're bound to douse this in syrup anyway.

I've really enjoyed these sticks for an elaborate-feeling, but utterly easy breakfast; and hope you do too! I know a little momma who claims they're a "life saver"!


Freezer-Friendly French Toast Sticks
Adapted from Taste of Home

Ingredients: (Note: I did a recipe-and-a-half to do a whole loaf of French bread)

6 slices day old bread (ideally in thick slices)
4 eggs
1 c milk (any kind - I used unsweetened vanilla almond milk)
2 T sugar
1 t vanilla extract
1/4 - 1/2 t ground cinnamon
1 c+ ground cornflakes (or other cereals), plus more as needed

Method:

Cut each piece of bread into thirds to make sticks.

In a large casserole dish, whisk eggs, milk, sugar, vanilla and cinnamon until well mixed. Place bread in the dish and allow to rest for 45-60 seconds. Flip the bread to coat other side.

Dip each piece into crushed cereal, coating all sides.

Place on large greased baking sheet. When completed, place baking sheet into the freezer for at least 45 minutes or until bread is firm and partially frozen. Transfer to a labeled freezer bag or airtight container in the freezer. (I would suggest using within 2-3 months to avoid freezer burn.)

To prepare frozen sticks:

Preheat oven to 425. Place desired amount of sticks on a lightly greased baking sheet. Bake for approximately 8 minutes, flip and bake for another 8-10 minutes or until golden brown and hot.

Serve with powdered sugar, syrup and/or sliced fruit.

Wednesday, June 18, 2014

Itsy Bitsy Stuffed Peppers

Let me start by saying that I am awful at naming dishes, much to J's disgust. My mom makes a delicious tomato-Velveeta pasta dish that I've called "barf' since I was old enough to be so openly sassy; and for as long as I can remember, I've always called stuffed peppers "monkey brains." And that was totally normal in our house.

However, since the first time I pulled a vacuum-sealed bag out of the freezer and told J we were having "monkey brains," I haven't heard the end of it. Yeah, yeah, I know, it sounds awful and since it's visually quite similar, that makes it even more unsettling and disgusting. But, I won him over with the delicious bell peppers stuffed to the brim with a mixture of ground beef, rice, tomatoes, onions and spices. We even made our own last week using leftover golubtsi filling!

And after last week's recipe book re-do (more on that another time) we decided to try a recipe for itsy bitsy monkey brains.. er, um... stuffed baby bell peppers.


This recipe was pretty simple, although somewhat time consuming, and generally good for you. Unlike most stuffed pepper recipes, this one didn't call for any carb-y fillers like bread crumbs, rice or oats - it was clean eating at it's finest, just meat, vegetables, and spices with limited amount of cheese. We did use a pre-seasoned sausage (Johnsonville hot Italian links, casings removed), so that is more processed than if you went to a butcher shop and had sausage ground up for you. But we trust and enjoy this brand (and had it on hand) so we decided to use it. If you aren't using a pre-flavored sausage you will want to add more dried spices and fresh peppers (see note below) to get fully robust flavor.

I grabbed the first pack of sausage I found in our freezer and it turned out to be hot, which paired with the chipotle chile powder made for a very spicy bite. But it wasn't overly spicy and paired really well with a dollop of plain, non-fat Greek yogurt. The spiciness is well-rounded, not just a burn-your-mouth heat, but a smoky flavor that compliments the innate heat and sweetness of the peppers. The muenster melts beautifully and adds a buttery consistency and flavor to the heat. And the final squeeze of lime juice adds a tartness that cuts through the heat and brightens the flavor of the pepper. I loved that each component of this recipe - the filling and the blistered peppers - tasted great on their own and paired together. To make successful dishes, you have to use individual delicious components.

This recipe makes quite a portion - around 24 peppers - which we served for dinner with grilled corn and will use the leftovers in an eggy hash tomorrow morning. But I can see this making for the most beautiful cocktail appetizer. They are quickly eaten in two bites without utensils and would be a vibrant canape for any party! I will suggest that if you choose to serve them in that way, you should blot the pepper skins after their quick "fry" and drain the sausage after sauteing. The peppers are naturally juicy and with the added oils, they can be somewhat slippery and leave a bit of a trail of juice, which works if you're eating off of a plate but not so much on a cocktail napkin.

Also, like most stuffed pepper recipes, this has make-ahead and freezer-friendly potential. You can pre-blister and stuff the peppers up to 4 hours in advance and then bake off when you're ready. And you can also pre-stuff and then freeze them to bake later. This would be particularly economical since you only need 1/2 lb. of sausage, which usually comes in 1 lb. packages. If you're freezing to bake later, I'd suggest not blotting the grease, just to make sure they don't get overly dry. I'd put them in the fridge the night before you plan to serve them and bake until heated through. They won't be as pretty; the pepper skins will probably be a bit softer, but they will still taste delicious.

Enjoy!


Stuffed Baby Bell Peppers
Adapted from Food Network Magazine

Ingredients:

3 T extra-virgin olive oil
1 lb assorted baby bell peppers (approx. 24)
1 small onion, diced
3 cloves garlic, minced
1/2 t. ground cumin
1/2 t. ground oregano
1 t. chipotle chile powder
kosher salt
1/2 lb. hot ground sausage*
3 oz. muenster cheese, diced (about 3/4 c.)
lime wedges, for serving

*If using plain ground pork or plain pork sausage, add 1 poblano chile, seeded and diced; 1/2 t. ancho chile powder

Method:

Preheat oven to 425. 

Heat the olive oil in a large nonstick pan over medium heat. Add the baby bell peppers in a single layer and cook, turning, until the skin blisters and they begin to brown. About 8 minutes. Transfer to a plate. 

Add the onion, garlic cumin, oregano, chile powder(s), optional poblano and 1 t. salt to the skillet. Cook, stirring until the onions are softened. 

Increase heat to medium high and add sausage; breaking up with a wooden spoon and cooking until pork is no longer pink. Remove from heat and cool. After cooling briefly (or until room temp. -- depend on how much time you have), crumble sausage into fine pieces and stir in cheese. 

Make a slit in each pepper with a paring knife, cutting from stem to tip.Stuff 2-3 tsp. of meat mixture into each pepper. Place on a parchment-lined baking sheet. 

Bake until peppers are hot and cheese has melted, around 10 minutes. 

Season with salt and serve with lime wedges.

Saturday, June 14, 2014

Easy & Delicious Overnight Oats

Breakfast and I are frenemies.

I love the idea of starting the day off with a beautiful meal that energizes me and keeps me going until lunchtime. On days when I don't eat breakfast, I'm dragging through the morning at work and usually overeat the rest of the day.

However, I don't like the idea of getting up earlier to cook or eating so early that I'm starving by 10:00 a.m.

The best breakfasts for me are ones that I can prep ahead of time, require little or no effort in the morning and are portable so that I can eat them at my desk on my own schedule.

For about a year-and-a-half, I was keeping Special K cereal and soy milk at work and eating a tiny bowl each morning; in the last few months, I was trying to make powder/almond milk meal replacement drinks. But what I've realized is that if my morning meal isn't something worthwhile, or homemade instead of out of a box or a can, I make it less of a priority and am more likely to not make time to eat, much less enjoy it.

So I've been thrilled by the breakfasts we started making with our clean eating detox. These meals were homemade but not difficult or time consuming. The dishes that required a.m. cooking were still quick, like omelets or fried egg hashes, but more times than not they were prepped and/or cooked ahead of time for great grab-and-go breakfasts. One of my favorites was the strawberry overnight oats and I've started experimenting with the recipe to include other flavor profiles and textures.

This week, I stumbled across a great recipe for cinnamon overnight oats with bananas, peanut butter, pecans and maple syrup - and it was stellar!


Overnight oats are made the night before (at least 8 hours) with a variety of oats and/or seeds with some liquid or dairy products - milk (dairy, almond or soy) or yogurt (we've only tried Greek) - and some seasonings and occasionally, mix ins like fruit or nuts. It looks like a watery mess when you make it, but the liquid is absorbed so fully and the oats plump up beautifully and the seeds soften, too. In the morning, your jar is filled with something that actually looks like traditional oatmeal, not the goop you left there last night.

You can eat the oats straight from the fridge, like a parfait, or you can microwave it for 30+ seconds to get it warm. I'll admit it feels very strange to eat oatmeal that isn't piping hot and warming you all the way through, but it's actually delicious, especially in the summer when it's hot all day and every day. This recipe was a great blend of both - the oats stay cold, but you heat up the toppings and swirl them into the oatmeal. And that requires hardly any effort - I packed all the components in separate containers and only had to stir them together when I got to work.

When I looked at the recipe I worried that it could be sickeningly sweet - with bananas, peanut butter AND maple syrup? I just knew I'd be choking down the diabetes-in-a-jar. However, the way you mix the ingredients, the oats are actually very simply flavored. They aren't sweet at all and the dominant flavor is the spiciness of the cinnamon. The toppings - which are portioned perfectly - add just the right amount of sweetness and nuttiness and a great mixture of textures (and temperatures). Swirling everything together makes for perfect bites with crunch, the mouthfeel of oats, creamy bananas and peanut butter and a sticky, silky maple syrup.

And one of the best, and most surprising, things about this breakfast is just how filling it is. The portion is almost too much, and having double proteins the fullness lasts for hours.

If you're looking for a way to simplify your mornings and improve your first meal of the day, give this a try; I'm confident you won't be disappointed.


Cinnamon Overnight Oats with Bananas, Peanut Butter, Pecans and Maple Syrup

Adapted from Radiant Rachels

Makes 1 serving

Ingredients:

1/4 c oats
1 T chia seeds
1/2 t cinnamon
3/4 c almond milk (I used unsweetened vanilla)
a splash of vanilla extract
1/2 ripe banana, sliced
1 T natural peanut butter
1 t maple syrup
2 T pecans, toasted

Method:

In a small bowl, combine oats, seeds, cinnamon, milk and vanilla. Stir until cinnamon is mixed in well.

Pour into a pint-sized mason jar or other airtight container and refrigerate overnight (for at least 8 hours).

Before serving, microwave banana slices and peanut butter in small microwave safe container for 30 seconds, or until p.butter is warm and almost runny. Pour over oats. Top with pecans and drizzle maple syrup over top.


Saturday, May 24, 2014

Our Clean Eating Detox: Day 0 Observations

Because we are pursuing a healthy lifestyle and love to try new things and/or are masochists, J and I are starting a Clean Eating detox tomorrow.

Clean eating is a premise we've flirted with some in our cooking, and find exceptionally intriguing. We recently had a conversation with a friend about how little legitimate food we are actually eating. As a society - if not an global era - we are eating more processed, refined food-like products rather than actual, unadulterated fruits, vegetables, proteins and grains.

Just look at the ingredients on the back of this snack pack of animal crackers. I bought them because they were inexpensive and in a low-calorie serving, but then the ingredients were pointed out to me.

Gotta love the typo too... 
Although clean eating diets do combine elements of several "trendy" diets - low carb, gluten-free, organic - it's based on the solid principal of cooking and eating ingredients that are as close to their natural state as possible. So the summer Cookout shake binge is on hold, but the recipes we're working with for the next two weeks look pretty great.

The detox is a plan we found on Buzzfeed - the black hole into which all 20-somethings fall and lose hours on end - and is thoroughly planned out. Seriously, we're talking 53 pages of menus, FAQs, equipment (paltry) and grocery (insurmountable) lists. The cleanse lasts 14 days and is planned where several "big batch" dishes are made that will be served in several meals so they've scheduled everything perfectly - even the Saturday prep days, what to pack in your lunchbox, how to store it,  and freezer packs with "when to thaw" instructions. Each day includes breakfast, lunch, a day snack, dinner and a night snack. Only a  few of the recipes repeat - only breakfasts and snacks - so it's a ton of variety.

The variety makes for an impressive fortnight menu that's heavy on the veggies and fruits, fatty proteins like nuts and fish, and white meats, but not light on flavor. For example: Day 5 includes a cauliflower omelet, quinoa and blueberry salad with lime and mint, carrots and hummus, salmon with green beans and lentils and blueberries with almonds.


We start our clean eating adventure tomorrow, so today was spent shopping and doing prep - and it was quite an educational undertaking.

First, I'd like to say that the pre-planned grocery lists are very heavy on the first week - so you can do freezer packs and make dishes late in the week, with leftovers continuing into Week 2. With that being said, List 1 had over 60 items on it -- only a few of which we had on hand at our house, spices mostly (Week 2 has 30+). So one of our first lessons was that clean eating is...expensive! 

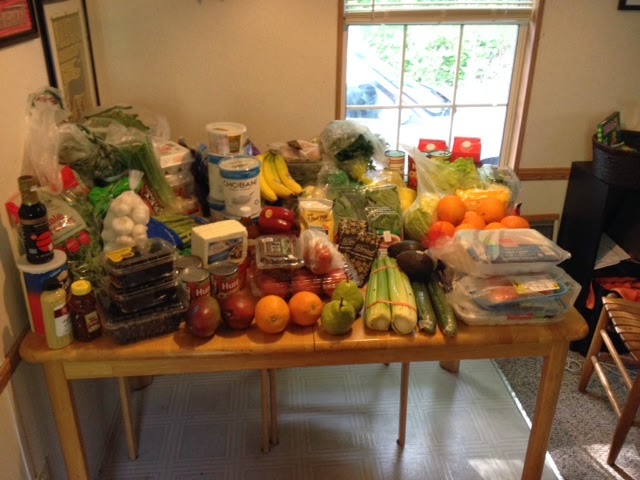
The plan is designed for one person, so we had to double everything (quite a math struggle - especially with some units/ingredients "quart container of basil"??) and that pushed our bills (yes, bills, more on that later) even higher. Look at the sheer amount of food we had to purchase.

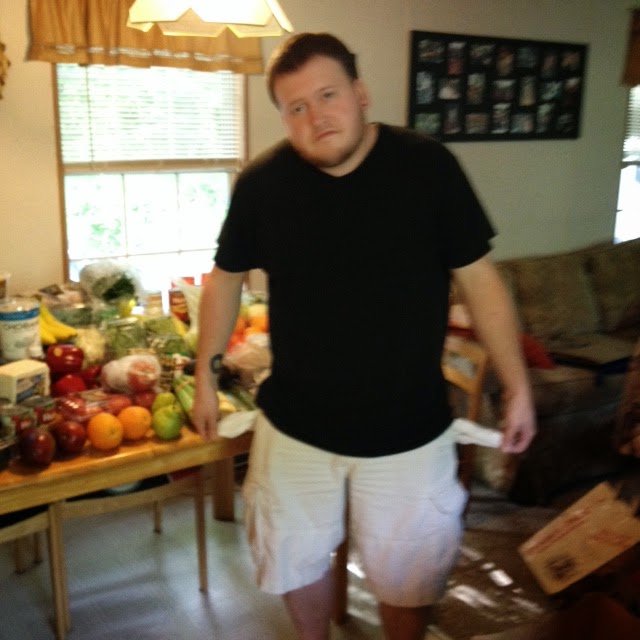
For perspective - this table seats two full-sized chairs per side. We thought we'd have to use the leaf to hold all the food!
This haul included, but was not limited to: 128 oz. plain Greek yogurt, 24 oz. feta cheese, 24 oz. 70% cacao dark chocolate, 4 red bell peppers, 2 lbs. spinach ...


8 oranges, 2 oz. fresh mint, 64 oz. unsweetened plain almond milk, 20 oz. bone-in, skin-on chicken breast; 20 oz. fresh salmon, 20 oz. ground turkey, 4 bulbs of fennel, 2 seedless English cucumbers...


a bottle of Tamari (gluten-free soy sauce), 6 bunches (12 c.) of kale, 53 eggs (for both weeks, thank goodness), 28 carrots and so much more!


Certainly not the way to an efficient fridge... 
I won't throw out a number, but let's just say that this shopping trip was at least three times more expensive than our regular weekly, to bi-monthly trips - and this was just food, no toiletries, cleaning supplies, home goods included!

We did try to remind ourselves that this is every scrap of food we will be eating for a solid week (and then some) - we won't be making stops at the store on the way home after those "what do you want for dinner" conversations where we end up buying way too many things for one night, but not enough to satisfy the rest of the week's meals and we won't be going out to eat AT ALL.
J: "60 grocery items and not an Oreo in the bunch..."
But still, this is a cost-prohibitive menu for many; I know we couldn't do this year-round. I"m a bargain shopper - I will go from store to store and back looking for the best deal (we did that today to J's chagrin) and I was struggling to find products with suitable price tags. For example, at Harris Teeter I could hardly find any non-organic foods. They were all farm raised, free-range items that were at least 10% more expensive than their (absent) counterparts normally are.

And that's one of the biggest issues with food insecurity and health in the US. Fresh, unprocessed (read:good for you) food is much more expensive than junk food. While begrudgingly shopping (it went from fun to tiring quickly), we talked about how although it wouldn't be nutritious and certainly would lose it's deliciousness quickly, a loaf of bread, jar of peanut butter and some lunch meat would help a paycheck or SNAP (food stamps) go much further. And if you're in a tight spot, sometimes choosing between the dollar menu and organic produce has to be a choice about money.

Many areas are fighting this trend; farm gleaning projects bring fresh produce to food pantries, neighborhoods are starting community gardens and co-ops, and buying local CSAs provide reliable and less expensive produce, but in many places, these projects don't exist.

Which brings me to my next point. Clean eating is...potentially geographically biased. Another major issue with food disparities in the US is the undeniable presence of food deserts. Food deserts are places where "fresh produce is scarce and greasy food abounds." Think of big cities where the only sources of "groceries" are corner markets that are cramped and filled with non-perishable, processed items or rural areas where grocery stores are difficult to reach, especially without owning a car. This is a reality for many people and we were very aware of this while shopping. We actually drove an hour to Asheville where we knew we could find all of the ingredients we needed, and even then had to go to over four stores. There were many items we were skeptical about finding, and especially finding in good quality, quantity and pricing in our hometown. We stopped at our local grocer on the way home for goods we knew they'd have (at great prices) and saw some of the things we thought required a trip to Trader Joe's or Earthfare, but that isn't the reality for everyone.

Here are some of the items we didn't think we would find (or find affordable) in our town - quinoa, chia seeds, ground flaxseeds, tamari and medjool dates.


From the shopping trip alone, we can tell that this detox may also be... time consuming. There will be considerably more prep-time required as opposed to making Hamburger Helper or picking up a pizza. And while that can be another disadvantage for the working class, this detox plan does offer very detailed instructions for multi-tasking and make-ahead meals and freezer pouches.

But, so far, I can say my overwhelming feeling about clean eating is...excitement.  I do not doubt this will have challenging moments: some of these foods are not my cup of tea, and speaking of tea, J is already dreading going without coffee and only being allowed three cups of unsweetened green tea per day; and I think I may struggle with hunger. Yet, I'm still excited to try new things. I can honestly say that I've never made any of these recipes before and without the menu would never buy 30% of these items .


I think it's going to be fun, delicious, and most importantly, good for us!

Buzzfeed promises we'll feel like this when it's over..


We'll certainly share pictures of our moods - and dance moves - throughout the process! Stay tuned!

Monday, April 7, 2014

Gourmet Goals and Cooking Confessions

Too often, chefs and even homecooking food bloggers portray an image of being perfect gourmets who can improvise with ease, conquer any recipe and are experts in all cuisines. I don't want to do that here. I intend to show you that no one is without fault and everyone has big goals, even in the kitchen!

So I have a few personal cooking confessions, palate prejudice and gourmet goals to share with you.

Cooking Confessions

  • I struggle with multitasking. Too often, I get too ambitious and get overwhelmed cooking. This is one of the reasons I love make-ahead entrees or Crock Pot dishes that take care of themselves so that I can focus on other elements. 
  • I can be really shortsighted with cooking. I'm not really creative when left to my own devices but I do feel really confident in my ability to follow a recipe - probably too confident. I think that everything will be much more simple than it is. 
  • I can be recipe gullible. I know what makes for good flavor combinations but I often assume that all recipes that get air time must be good. This is dangerous and is the impetus for J's "one Pinterest recipe per meal" rule...
  • I'm forgetful with ingredients. This is probably why my skills of improvisation are improving - because I think we have 2 cups of mozzarella but we actually only have 1, so I have to add Parmesan, cheddar and feta to meet my needs. 
  • I make assumptions about local grocery stores. I assume that most ingredients are readily available and hopefully in appropriate packaging and price points or I don't fully understand my ingredients - that's what caused the Canned Salmon meltdown of 2012 (who knew it had skin and bones in it?!?!). Another moment to be a better improvisational cook!
For some common cooking mistakes, look here at Real Simple's suggestions to fix food flubs. 

Palate Prejudice 

Here are a few of the ingredients/flavors I despise and try to avoid as often as possible when cooking or eating:
  • Fennel/ star anise/ licorice - just why?
  • Cilantro - in large quantities, I think it tastes just like soapy dishwater
  • Strong liquor flavors - I'm not far enough away from my college drinking (read: vomiting) days to be able to appreciate strong booze again
  • Raw, seed-filled tomatoes - I love tomato products and tomatoes without "guts" but I can't stand that slimy stuff!

Gourmet Goals

I've been cooking since I was a kid and have tried a number of types of cuisine and methods of preparation but I still have some goals for dishes and techniques that I want to master. 
  • The Art of French Cooking - I've made her Bouef Bourguignon, but I want to try more of Julia Child's French recipes (minus the aspics)
  • Savory and sweet souffles - I made one in a rush on Valentine's Day and it was so-so. This dramatic dish needs to be perfect
  • Southern staples - most notably fried chicken, biscuits and cornbread
  • Perfect knife cuts - if you asked J, he'd probably say my knife skills are irregular at best, insanely dangerous at their worst
  • Homemade pie crust and pasta - two of my most favorite carbs!
  • A signature cocktail - I know I said I don't like strong liquor flavors earlier, but I do think having a good knowledge of what to order at a dinner or what to shake up at a party is an important grown up skill. And rumor has it, some drinks don't taste just like nail polish remover - if you make the right, you might just enjoy them! 
  • Knowledge of meat cuts - I get the poultry ones and some basic red meat cuts but I have no idea what the difference is between various roasts in terms of texture, flavor and cooking needs but also where they are located.
  • Food photography for this blog - I know that's petty and probably has a lot to do with both the lighting in our house and my sub-par phone camera but to convey the best food to you, I need to work on my pictures and art direction. J's the artistic one and takes better food photos but I'm trying! 

I shared these tidbits with you as encouragement. Everyone - chef or not -is a work in progress in and out of the kitchen and we have to keep that in perspective. We all have things we like and don't like, no matter how flexible a palate we have; things we want to accomplish and faults to work on. I hope our blog gives you encouragement and shows you that the thing that drives good meals is a passion for food and sharing with folks you love. 

Monday, March 24, 2014

Meatball Sub Casserole

Daylight Savings Time is still getting the best of me and I find myself scrambling to finish all of my new-found chores to do in sunshine and get dinner on the table before 8:00. So, I've been looking for quick, easy-to-make dishes and tonight I made a real winner.

I was inspired by a pin on Pinterest for a meatball sub casserole but when I was making our grocery list, the pin didn't work and was probably some type of Trojan computer virus crap. So, long story short, I found a Taste of Home recipe and adapted it to the contents of our fridge and the week's menu.


I'm a real sucker for casseroles, but this one was wonderful! My food photography skills are limited at best, but I couldn't even get a good picture before we devoured he whole thing! J said that I will just have to make it again soon "just for pictures."

The flavors were wonderful and blended together perfectly. J works at a successful local deli and sandwich shop, so he knows his sandwiches and was skeptical of some of the components of the casserole but it worked beautifully. The bread we used was soft and delicate, so the cream cheese spread on it added a great richness that would've been lacking with just the basic meatball sub ingredients. I added sauteed onions and they brought a crisp bite to the softer ingredients and the good sear on the meatballs added another crispy quality, too. 

I can't say enough good thing about this recipe. 

It's a great "double duty" recipe, which I love. For example, I try to plan as many meals off of the same ingredient list as possible. We had subs and chips for dinner last night and saved the unused half loaf of French bread for tonight's dinner. It also doesn't require a lot of sauce, so we were able to use leftover sauce that I'd kept in a mason jar from our last spaghetti night. This is a great budget-friendly way to get the most bang from your buck - especially if you're only needing to cook for two. This dish makes three servings, you can multiply it as needed to feed a crowd - I think this a perfect dish for a potluck, taking to a sick friend, or making for a large dinner party. 

This is a really customizable recipe, too, and you can change it to suit your family's tastes and your timeline. I added garlic to the cream cheese spread and sauteed onions. I think sauteed mushrooms would be a great addition and if you're wanting to really appeal to kids' cliche notions of Italian food, you could add a layer of pepperoni. To save time, I used frozen (it is National Frozen Food Month, after all), pre-made meatballs (less than $5 for 60+ meatballs) that I cooked in the oven according to package directions but you can certainly make your favorite homemade recipe. I'm including ToH's recipe for meatballs but I know that when I make it again, I will probably use my own meatball recipe. 

And speaking of a time-saving, this is a great recipe where you can make all of the components ahead of time and assemble and reheat quickly before dinner. You can cook your meatballs and mix with the sauce ingredients, prepare the cream cheese spread and slice your bread. That will make for simple mise en place! 


And is a great recipe for kids - make sure they're either dealing with pre-made meatballs or know not to touch their mouth (or anything else) while handling raw meat. 

I promise I'll make it again soon -- just to get you some good photos!

Meatball Sub Casserole

Ingredients:

Meatball Ingredients- it not using 20 pre-made, frozen meatballs:

2 T chopped green onion
1 T seasoned bread crumbs
1 T grated Parmesan
1/3 lb lean ground beef

6 slices French bread baguette, sliced 1/2" thick
2 oz. cream cheese, softened
2 T mayonnaise
1/4 t Italian seasoning
2 cloves minced garlic, divided
dash pepper
2/3 c shredded mozzarella cheese, divided*
1/4 c grated Parmesan cheese, divided
1 c spaghetti sauce (I used Hunts' original sauce)
1/4 c water


Method:

Preheat oven to 400. Mix meatball ingredients together by hand in a medium bowl. Roll small meatballs - will make over twelve 1" meatballs. Bake on a shallow baking pan for 8-10 minutes or until no longer pink inside. Drain on a paper towel.

Arrange bread in a single layer in an ungreased 8x8" baking dish. Combine the cream cheese, mayo, Italian seasoning, pepper and half of the minced garlic. Spread over bread.  Sprinkle with half of the two cheeses.

In a bowl combine the spaghetti sauce (if you have enough, use only 1 1/4 c spaghetti sauce, or add 1/4 c water to 1 c sauce), and garlic; add meatballs. Pour over bread and evenly distribute the meatballs. Sprinkle with remaining cheeses.

Bake uncovered at 350 for 20-25 minutes until heated through.

*Feel free to add more cheese! I love the extra gooeyness!

Saturday, March 8, 2014

Simple Touches Make A Big Difference

I've mentioned before that while I appreciate slow dishes, stewed to perfection and take a real commitment of time, and usually high quality ingredients, I also love meals that are super fast and inexpensive. I don't always have the time or money required for some of my favorite recipes and we have to use simpler, often pre-packaged items in a pinch - and we're certainly not the only ones.

Food insecurity and food deserts are real issues across the country - and even our own community. With wealth disparities also come deficits of time for cooking and an inability to buy expensive, fresh ingredients. However, I want to plead the case that just because a meal involves simple, "low-brow" or pre-made/pre-packaged components doesn't mean it has to be any less special, delicious or full of love. I would argue that little, homemade, heartfelt choices can jazz up a meal that would otherwise be straight from the box (literally) and I want to share two such recipes - that we use frequently - with you.

When I was little, we were in a different place financially, and living in a rural area my family didn't know a lot about food. We ate a lot of country (and inexpensive) staples like cornbread, biscuits, potatoes and green beans, jellies and meats we canned ourselves. The majority of it was homemade but nothing like the crazy things my dad makes now (like bibimbap?!) and looking back at some of our "treats," I can't help but laugh. And it's absolutely not because I am ashamed or embarrassed, but the nostalgia of my childhood is just too funny to me.

One such treat, one of the first desserts I ever remember "making," was strawberry shortcake. We used to get these little pre-made sponge cakes that were practically flavorless (and only $1 for six!) and we'd top them with whipped cream and strawberries we'd cut up ahead of time and covered up sugar.

The sugar on the strawberries is the most important ingredient. It only takes about 2 T for a whole bowl of sliced strawberries, but left on them for a few hours, they make the most delightful, sweet juice - just perfect for shortcake! And instead of using plain white sugar, we use homemade vanilla sugar.

Feeling nostalgic, we made strawberry shortcake!
Albeit vanilla sugar does take some patience, but it couldn't be simpler to make and is easily refreshed. All you need is vanilla beans (we usually get Madagascar beans from MySpiceSage.com - they're a wonderful spice website that is inexpensive and gives freebies - usually vanilla beans - alot), white sugar and some sort of jar or airtight container.

Slice the beans in half so that you have two short halves, then split them open. Place them in your container and cover with sugar. We usually use half a bean per pint jar. Allow to sit for at least a month - the longer you leave it, the deeper the vanilla flavor. And whenever you've used up all of your sugar, just add more and repeat the process - the beans are very potent and will last through several refills.

After the sugar is ready you can use it in anyway you'd use regular sugar (in sweet dishes -- I wouldn't add this to chili or spaghetti sauce etc.). You could put it in your coffee, on french toast, in any pastry or, as we did, over sliced fruit. The vanilla adds a light sweetness and makes the most subtle, delicate changes in your dishes.

This is a wonderful touch for your dishes at home and adds a foodie feel to even the simplest of dishes, but it also makes a great gift. You can make it ahead in big quantities for holidays, decorate the jars and give out as beautiful and inexpensive gifts! We love our vanilla sugar so much that we actually gave out as favors at our wedding (with an added LEGO craft, of course).


Another quick, but impactful recipe is making your own seasoning for fries or homemade chips. We go to Grocery Outlet and stock up on $1.99 bags of french fries every few months and add them whenever we're short on side dishes. I am a french fry freak and I absolutely have a hierarchy of the best fries around and generally, frozen fries are on the bottom. However, using this Red Robin/Zaxby's knock-off seasoning, we're able to elevate ho hum fries into incredibly flavorful ones. And, the seasoning, which usually lasts us 3-4 months, costs less than $1 to make!


Mix 3 T salt (you could easily get away with 2 T if you're watching your sodium), 1 T instant tomato soup or spaghetti sauce mix, 2 t chili powder, 1/4 t ground cumin and 1/4 t ground black pepper. Store in an airtight container. 

I use this seasoning on practically any potato-product, but be sure to sprinkle this on immediately after cooking the dish - right after the fries come out of the oven/fryer etc. - to be sure it will stick. 


Providing a good meal doesn't have to involve a lot of time or money! I hope you take these two recipes and find your own way to incorporate small, homemade touches into your meals - making your own salad dressings and sauces or finding ways to jazz up boxed meals (check out Semi Homemade by Sandra Lee). 


Monday, February 24, 2014

Meatball & Tortellini Soup

This month's church fellowship was a Soup & Pie luncheon. How much more homey can it get than a warm bowl of soup and a sweet slice of pie? For the meal, I brought a new, fresh-tasting soup with vegetables, meatballs and tortellini (and my classic peanut butter pie - but I'm not ready to share that one yet).

It's a light soup (less than 500 calories/serving) - with low-sodium broth instead of a cream base, fresh vegetables and flavorful, caramelized meatballs. Like chicken noodle soup, this recipe is hearty without feeling heavy or overly rich. The light saute on the veggies gives them a firmer texture that makes for a satisfying bite. And the meatballs don't become dry but the quick browning gives them deeper flavor.


This one-pot soup made for quick prep and worked really well for the potluck because I was able to do 90% of the work the night before then only had to reheat and add the last two ingredients quickly at the end. It also kept well in the Crock Pot - if you have a CP with a locking lid, you're golden with this dish! 

This is also another great opportunity to bring your kids in the kitchen. This could be good for youngsters - even toddlers - who like getting their hands dirty (and know not to touch their mouths during or after) and want to help with the meatballs; but would be especially good for a young kid - I'm thinking 7 or 8 - who can manage simple cuts and would be able to sear the meatballs. Soup is a great place to start teaching your children how to cook because they're fairly inexpensive (this was less than $2/serving and most of the ingredients are pantry staples), so little can go wrong and they are such improvisational dishes - got a little too overzealous with the stirring? Fine. Ground meat instead of meatballs would be fine. No stress!

Grab a bowl and ladle yourself a great big helping of this delicious soup!


Meatball & Tortellini Soup

Ingredients:

8 oz. ground beef
1/4 c grated Parmesan cheese
1/4 c chopped fresh parsley (or 2 T dried herbs -- I used Italian seasoning)
1 large egg
1 clove garlic, minced
kosher salt, ground pepper
2 T extra virgin olive oil
2 carrots diced
2 stalks celery, with leaves, diced
1 quart (two 16-oz cans) low sodium chicken broth*
9-oz package refrigerated cheese tortellini*
4 c loosely packed baby spinach

Method:

Combine beef, cheese, half of the parsley or herbs, egg, garlic, 1/2 t salt, and pepper to taste in medium bowl. Mix with your hands until just combined - over mixing will make your meatballs tough. Form into small meatballs (1" at the biggest, I made mine miniature so I had about 24+). 

Heat the oil in a pot or Dutch oven over medium-high heat. Add the meatballs and cook, turning over when golden - until all sides are lightly browned (3-4 minutes, faster for smaller meatballs). Remove the meatballs to a plate. 

Add the carrots and celery and cook in the pan drippings until just softened. Add the broth and 3 cups of water; bring to a boil. Return the meatballs to the pot along with the remaining herbs and 1/2 t salt; simmer until the meatballs are just cooked through (about 2 minutes). Note: if you are making ahead - stop here and refrigerate until 15 minutes before serving and then bring back to a boil.

Add the tortellini and cook until they float to the top, about 4 minutes*.Note: if you are making this soup for only 1-2 servings instead of the full four, only make the fraction of the tortellini you need at the time. If pasta is stored for long periods of time, it absorbs liquid and becomes soggy. Add fresh pasta for each later serving. Add the spinach and cook, stirring until wilted. Season with salt and pepper. 

*Note: You can use dried tortellini as well (I did). If you do this, use an 8 oz. package (I used Barilla three cheese) and add another 16 oz. can of chicken broth. You'll need to cook the tortellini longer (about 8 minutes) and they will absorb more liquid. Keep an eye on it and you may want to add more water or broth if your soup looks too "thick," with little broth.