Sunday, December 14, 2014

More Bang for Your Buck at The Dollar Tree

Today I made my pre-Christmas grocery list and because I was dying to get in the holiday spirit even more, I added the items needed to make some of our favorite Christmas staples, plus some good food gifts.

I knew I wanted to make my boss his favorite linzer tart cookies, they were a big hit last year and his sweet tooth has only gotten more ferocious in 2014.


The old fashioned apple stack cake I made for Thanksgiving was requested again for our employee potluck on Wednesday.

There's no rain in sight, so the humidity is just right for J to make the old family recipe for delectable peanut butter fudge.

And it's just not Christmas until we break out two of my mom's classic recipes - peanut butter sandwich cookies (gluten-free and only 4 ingredients!) and spiced hard candy.


Mom's hard candy takes a certain touch - no candy thermometer used here, just the "feel" of the molten sugar - and is not for the faint of heart. We used to make batch after batch after batch when I was a kid and I'd pass it out to all my classmates and teachers. But as often happens, time got in the way of tradition and we haven't made any in years. So we had to initiate J into the cinnamon candy cult. 

At the "hard crack" stage

Cooling on a marble slab on our coffee bar (more on the "Dream Kitchen" later)

Our final product!

All of these projects made for quite the grocery list of ingredients, tools and containers. And I knew today's haul had the potential to be a bank-breaker; but we were able to save a ton at our local Dollar Tree.

I've been a devout customer since I started getting an allowance as a tween and realized I could buy 10x more tacky, glitter makeup there than at Wal Mart (the early '00s was an awkward time for girl fashion). But I was completely converted in college when DT started renovating their stores to carry a wider variety of higher quality goods - that were all still a dollar. I don't know if it was a stroke of genius or by necessity (what with the recession forcing more people to shop on a budget) but stores expanded to offer more food (even frozen items!), party supplies, bake wear and huge seasonal departments. Our town just renovated their location within the past two years and I couldn't be more grateful. 

DT offers great savings for so many aspects of my life: 
  • As a DIY wreath maker, I'm able to get good quality silk flowers and wire ribbon for, you guessed it, a dollar. 
  • I still write letters and the stationary at the Tree is wonderful and truly inexpensive; greeting cards are 2/$1! They even carry shipping supplies for when I send care packages to my adorable nieces.
  • Their kitchen department carries a number of handy items, from decent dinnerware to utensils perfect for taking to the office to disposable aluminum pans in a variety of sizes (these are perfect for pot lucks!); and even legit cake pans. 
  • I can't say enough good things about their food section. You can get name brand items for only four quarters! Most of the items are full-sized and obviously, a great deal - like cans of Hunts crushed tomatoes, bags of walnuts or packs of Hormel pepperoni. But, some of them are in smaller portions and are incredibly helpful for cooking-for-two or new recipes. For example, J's fudge recipe only needs 3 T of corn syrup, so there's no point in buying a giant bottle of Caro that will just make everything sticky; DT carries a little 8 oz. bottle. 
  • And the seasonal section is filled with adorable containers. Tins, snack bags, pails and boxes - for all your Christmas goodies! Just look at what we bought for our hard candy. Plus, I bought a snowflake-themed cardboard box for cookies. 

Today, we were able to buy over a third of the items on our list (plus some extras) at the Dollar Tree for only $16!

If you're looking to save some money, or just looking for quality, adorable items for almost any occasion, pop in to your local Dollar Tree and explore! You'll be amazed at how much you can get for your money... but also how quickly you'll fill your cart!

Wednesday, December 10, 2014

Cheese Plate Date Night!

This weekend J & I had another fabulous date night - this time at home, with a cheese plate, wine and two great food films, "Chef" and "The Hundred Foot Journey" (more on the movies later).

A local grocery store chain, Ingles Markets, has a fascinating cheese section at their Waynesville location. It's a few steps away from their antipasti bar - filled with marinated olives; curves gently around the edge of the deli close to their fabulously stocked bakery (fresh bread and pastries, homemade fudge, cronuts! and ice cream cakes) and is a two tiered celebration of all things cheese. There are colorful "moldy" cheese - like brilliant Roquefort's, soft goat cheeses marbled with berries, a variety of hard cheese and all the accouterments you'd expect, too (think melba toasts). This display fascinates me every time we stop in, and we finally decided to do our own cheese sampling at home.

We're both adventurous and with J being a sandwich artist, we are very pro-cheese and have tried a lot of different types. But the cheeses are usually inside a dish or sammie and we never get to taste them on their own or pair them with other small bites, so I did some research and we put together a pretty impressive and inexpensive (less than $30) spread.

Cheese plates may seem daunting but creating ours was relatively easy, even without going to a specialty cheese shop or a deli-counter. This Buzzfeed article was very informative about national, commercial brands and I was not disappointed by the brand I chose from it.

From the articles I read and our experience, here's my best cheese wisdom:
  1. Include a variety of cheese textures and flavors. I'd say at least 3 of the following categories: creamy cheese (like Brie), something fresh (like a chevre), something sharp (like an aged cheddar), something nutty (like gouda) and a wild card - something you've just been dying to try (buy a smaller portion of this, just in case)
  2. Don't rule out things you've had on hand for recipes but have never savored on their own. We had the chevre and blue cheeses already! 
  3. Intend to serve about 2-3 ounces of cheese per person
  4. Serve with lots of "extras" to either pair directly with the cheese or to nibble between bites. I suggest at least 3 of the following categories: dried fruit (like cranberries), fresh fruit (like grapes), crackers, warm bread, a flavorful spread (like fig jam or hot pepper jelly), nuts (salted or raw). 
  5. Bring cheeses to room temperature for one hour before serving - their flavors will be more vibrant
  6. J and I were multitasking and so we pre-sliced the cheeses and arranged them as such. If you are having a cheese plate at a party or serving a larger group of people, leave the labeled cheeses whole on the board (even the crumbly ones) with appropriate tools for your guests to serve themselves. 
  7. Set your tray up on a knife-friendly surface (wooden cutting boards are functional and pretty) and/or provide a cheese slicer. Also, place it in a prominent area at your party where folks can gather and munch - they'll keep coming back for more! 
Rule 6.1 - Cute cheese knives are a plus! 

We featured the following cheese on our plate: "Categories" (see above) listed in parenthesis.
  • Layered herb brie (creamy) - Brie becomes the most beautiful, gooey cheese when heated, but even at room temperature is still incredibly creamy and soft. This layered brie was "double decker" with a thin, herb-covered rind between the two. Some brie can have a rather thick, firm rind that, while edible, can be off-putting for some (like J). But this brand, was softer and with the herbs, the rind was flavorful enough to eat. In its unheated state, it's not great for spreading on bread or crackers but is so mild it pairs beautifully with apples or dried fruit. 
  • Asiago (nutty) - When I was younger, I loved shaking grated Parmesan on top of buttery popcorn and my dad said it smelled like feet. This cheese brought back all of those memories - but in a good way, I promise! It's a bold, assertive flavor like Parmesan, with a hard, grainy texture. It paired will with the fruits, salami and jelly whose flavored played off each other well. 
  • Cabot Seriously Sharp cheddar (sharp) - This was recommended by the Buzzfeed article and the name could not be more spot-on. It's strong and tangy with the beautiful texture we all know from cheddars. To me, Cabot products are upstanding members of the supermarket cooler because their business is owned by the farmers producing the milk, and they take care to do things right, like naturally aging their cheese, which makes for a better flavor. And of course, cheddar pairs well with apples. 
  • Chevre (fresh) - I did a copy cat of a snazzy dish called "The Frenchy" from a local restaurant. It really makes the goat cheese shine. I used about 2 oz. of chevre topped with 5-6 chopped kalamata olives and drizzled with extra virgin olive oil. It's creamy, tangy, salty and floral - so many flavors that blend so well together! I like to spread this on warm baguette slices for a fancy, but quick, appetizer. 
  • Havarti - If you like butter, creamy cheese, havarti is a great choice. Some can be slightly sharp, but most are pretty mild. I love the almost spongy texture; just a little too stiff to spread, but still tender. BTW this is a GREAT sandwich cheese; it pairs will with everything can be just the creamy touch to a meat-heavy sammie, plus is melts perfectly!
  • Blue cheese crumbles - I've mentioned before that I have a weakness for blue cheese recipes and like to try to sneak it in everything. This was another cheese we had on hand but never eat on it's own. I would like to try "fancier" brands sometime, but we used our go-to generic brand and it didn't disappoint. 


We also had the following "extras" on the cheese board: 
  • Craisins (dried cranberries)
  • Pistachios
  • Walnuts
  • Honeycrisp apple slices
  • Hard salami
  • Homemade hot pepper jelly
  • Monet crackers
  • Sliced baguette
The additional items really helped the cheeses to shine. I highly doubt I could have (or would have even wanted to) eat as much cheese as I did were it not for experimenting with different flavor and texture combinations. I would break the cheese slices in half and try one half with a bite of apple, then the other half with a bite of salami, and so on. It really amazed me how well they worked together to bring out different notes in each other. And I must say, the pepper jelly was amazing on everything, but I never would've guessed!

One of the really beautiful things about a cheese plate is that you can customize the "sides" with whatever you've got on hand and some other inexpensive add-ons (I actually got several of ours at the Dollar Tree) and can focus your time and budget on the cheeses themselves. 

If you're looking for an impressive spread for a romantic night in or a fun way to try new things with friends or impress at a party, a cheese plate is the way to go. You'll find wonderful flavors and make a great impression without breaking the bank or your back! 

For other ideas for you and your boo or fun fete food, visit our Date Night or Party Food tabs. 

Thursday, November 20, 2014

Warm & Hearty Cottage Pie

FACT: Cold days literally require warm and hearty meals that fill you up, raise your temperature and stick to your ribs the rest of the evening.

FACT: Few things are as perfect on a bone-chilling day as meat and potatoes. 

Which makes cottage pie an excellent dish for the bitter winter months. 

Tuesday it hardly got above 30 degrees in our town, and while we aren't trapped in the mega Snowvember storm that's pounding Buffalo, New York; we were mildly distraught at the incredible change in temperature; which made a piping casserole of cottage pie all the more delicious and comforting. 


Cottage pie is a traditional food of the UK - a cousin to shepherd's pie which is made with lamb - with a meat and vegetable ragout traditionally topped with mashed potatoes and baked. It makes for a warm and filling meal, even without any other sides, that leaves you feeling satisfied and your diet balanced. 

My dad made cottage pie a few times when I was younger, and even piped the potatoes on top with pea eyes to look like ghosts once and I loved it. He's been making it more frequently - perhaps out of sheer ease, how inexpensive it is to prepare and how far a dish of it can go, and we've started experimenting with it, too. 

You can take cottage pie in so many directions by swapping out standard meats and veggies, trying new top layers or even funky presentations. I didn't know it at the time, but some of my favorite mini-chefs on MasterChef Junior were actually tasked with elevating shepherd's pie on this week's episode (you can stream the episode and this season on Hulu/HuluPlus). I've tinkered with it some, but I think I've hit my stride with a recipe adapted from Clean Eating magazine (this was one of their few successes I mentioned). 

The meat mixture is actually vegetable-heavy, using very inexpensive winter vegetables like parsnips and carrots and lean meats. I've used beef and ground chicken and they both turned out well. Lean beef still adds some extra fat that gives the dish more juiciness, but if you use ground poultry you can add more broth and simmer it down some. I love ground chicken as a substitute for red meat and even grind it myself with my KitchenAid, and find it far superior to ground turkey which can become unbearably dry. Simmering the meat and vegetables with tomato paste adds an acidity and a richness that pulls all of the flavors together beautifully. Fresh carrots can be assertive, parsnips tend to be perfumy and canned pinto beans are almost bland, but the tomato paste and rosemary bring together the best of each ingredient. 


To avoid carb-o-loading, I top my pie with pureed cauliflower. I've featured cauliflower several times in posts and I think despite being fairly unappealing raw, it is one of the most versatile and delicious vegetables -- and it's almost a dead-ringer for mashed potatoes (but drastically healthier)! When making cauliflower puree as a side dish, I merely steam it then puree with garlic, S&P, and a tablespoon of butter; but to make it more cohesive with the meat, more flavor is needed. The chicken broth adds an earthy, saltiness that can be lacking and the lemon zest brings a surprising pop to what otherwise might be a one-note topping. 

This recipe makes four gigantic servings and is hearty enough to feed a lumberjack but sneaks vegetables in in such a way that even the pickiest child would enjoy it!

I highly recommend checking your local forecast and making this for your next cold winter evening!


"Clean" Cottage Pie

Ingredients:

1 medium sized head of cauliflower, chopped into florets
1/4 c + (see note above about ground turkey) low-sodium chicken or vegetable broth
2 t olive oil
3/4 t lemon zest
salt & pepper
3/4-1 lb ground lean meat
1 parsnip, peeled and finely chopped
1 carrot, peeled and finely chopped
1/2 large red onion, finely chopped
3 cloves garlic, minced
15 oz. can unsalted pinto beans, rinsed and drained
1/4 c unsalted tomato paste
1/4 c finely chopped fresh parsely
1/2 t dried rosemary
paprika

Method:

Preaheat oven to 400 and spray 8x8" baking dish with non-stick cooking spray. Set aside. 

Fill a large saucepan with water and fit a steamer basket on top. When water is boiling, add cauliflower to steamer; cover and steam until cauliflower is tender, about 15 minutes. Using either an immersion blender and bowl or a blender (such as a Ninja) blend cauliflower with olive oil, broth and lemon zest. Add salt and pepper to taste. Blend to desired consistency (I like mine super smooth, but small lumps would be good, too). 

Spray a large skillet with non-stick spray and add the meat. Cook over medium high heat, breaking up the meat with a wooden spoon until cooked through. Transfer meat to a bowl. 

Using same pan, cook sautee parsnip, carrot, onion and garlic until very tender, about 10 minutes. Add meat (and drippings), tomato paste, beans and herbs. Sautee for 3 minutes. (Note: If using a more dry protein, you can add more broth, if needed. I like for it to be "wet" but not sopping; this way it won't dry out while baking.)

Spoon meat-veggie mix into the baking dish, spread in even layer. Top with cauliflower puree and spread evenly. Top with a sprinkle of paprika. 

Bake on top oven rack until hot throughout and cauliflower is lightly browned, about 30 minutes. (Note: you can even broil it the last 2-3 minutes to get some extra brown and a little crunch on top). 

Monday, November 17, 2014

Thanksgiving Side Dish Showdown

The holiday season is nothing short of chaotic in our family with a minimum of three, and often upwards of five, gatherings to attend per holiday. They're also nothing short of interesting and lively; what with so many personalities, people we love, joyful moods and great food - lots and lots of food.

Our first Thanksgiving together - 2012
And this year, to capitalize on those quirky personalities, love of food and a desire to have a unique experience, my dad, J and I have created our own "game" for our Thanksgiving Weekend Meal.

It's a little bit like our Grocery Outlet Chopped Challenge; because we will be at the mercy of each other for our star ingredient but will still have lots of flexibility and thankfully (no pun intended), planning time.

We drew names and were each granted the power to declare an ingredient for our chosen chef to use to create a side dish. I picked Dad, J got me and Dad chose J.

Here are the rules we're using:

Ingredient:

  1. Will be announced on the Friday before Thanksgiving (November 21). 
  2. Can be a "category" (like pasta) or a specific item (like carrots)
  3. Should be reasonably priced (no caviar or black truffles) and limited in freakiness (Sorry, Mom; no root beer-flavored Magic Shell)
  4. Should be featured but not required to be the predominant ingredient
  5. May be a traditional Thanksgiving ingredient, but the dish should be non-traditional (like sweet potato gnocchi) OR the dish can be a twist on a classic T-giving dish (like a savory sweet potato "hot dish" instead of candied sweet potato casserole).

We have a few dietary restrictions (no caffeine or chocolate) and we know each others' palates and preferences well enough to not choose a total sabotage ingredient that the person won't enjoy cooking or eating (ex: Dad DESPISES tuna).

My inner Martha Stewart has been buzzing for weeks with the ever-growing list of items I want to cook for Thanksgiving, so I'm excited to have a more focused mission than "COOK ALL THE THINGS," with which to make something creative and delicious.

Dad proposed this idea less than 24 hours ago, but I'm already brainstorming - I'm thinking of the ingredient I want, and resisting the urge to pressure Honey Dearest into choosing it; how to handle the ingredient I do get and what to assign Dad.

And don't you worry dear readers; I'll keep you updated on the progress of this event AND on the recipes we're making for the 3+ other gatherings next week. There's plenty to come!

Tuesday, November 4, 2014

Fall Fat Kid Friday: Pumpkin Chocolate Chip Bread

Another post for my sweet-toothed "fat kids." This one's for the fall-flavor lovers in all of us and uses the veggie of the season to make a sweet, dense and soft pumpkin chocolate chip bread. You can be the star of your bake sale or your husband's breakfast (trust me) with this truly from scratch treat.

Pro Tip: Pour some batter into a ramekin for a taste test serving before slicing the loaves! 


Yes, Libby's has provided God knows how much canned pumpkin for the world. I know I ate my fair share as a kid; and loved it. But preparing your own pumpkin puree is so easy and inexpensive that you can certainly do it yourself. And as a bonus, homemade pumpkin puree is better tasting and better for you than canned, you're eliminating any unknown ingredients or fillers (Clean eating fat kid?).

Processing your own pumpkin really only involves four steps:

  1. Remove pumpkin top, slice into quarters and remove seeds/pulp. 
  2. Bake on a metal sheet pan, flesh side down, at 350 for 45-60 minutes, until tender. 
  3. Scoop out cooled flesh into a food processor, puree until smooth. 
  4. Place puree in coffee filter or cheesecloth-lined strainer for 8 hours to drain any extra liquid. 
For more detailed instructions with photos, visit Taste of Home's tutorial here.

You can then store it in airtight containers and can freeze for up to a year. We package 2 c. puree (equivalent to 15 oz. commercial can) in  zip-top freezer bags and lay flat to freeze. They're easily thawed in the fridge over night or in cold water (make sure the bags are sealed and haven't cracked) and you can use them for any recipe calling for canned pumpkin - including pasta sauce, ravioli filling, muffins or this splendid bread!

With store-bought or homemade pumpkin puree this recipe is a breeze and makes for a product that looks much more polished and difficult than it really is. From start to finish, your mixer will do most of the work with the exception of some light whisking and folding in the chocolate chips. Which makes for a wonderful opportunity to bring in your mini-chefs. Loaves of bread are wonderful gifts - for any occasion, and they're freezeable - and imagine the pride your child would have giving their teacher or grandparent a loaf of bread they made!

It bakes up into beautiful burnt orange dotted with gooey chocolate pieces and a shiny sugar crust. The batter isn't doughy and is thin, like a cake batter, but makes for hearty slices of bread that are still soft on the tongue.


And the flavor just screams autumn! Pumpkin, despite being the obsession of the middle class - I mean, pumpkin spice lattes even have their own trending hashtag #PSL - is a very subtle flavor. It has a squash-y undertone that is mild and savory but slightly sweet and can be manipulated in so many ways.

But as we all know from pumpkin pie, when paired with the right spices, pumpkin can sing. Warm, spices like cinnamon, cloves and nutmeg which are also "in season" in winter like hard squashes brighten pumpkin's flavors to a whole new level of comfort and deliciousness. So dotting that warm, spicy bread with semisweet (or even dark chocolate) makes for a great contrast and only adds to the texture. I sprinkle on extra raw sugar before baking (a trick I learned from Martha Stewart) to add a crunch to the top, but in this case it also lends a burst of sweetness.

This bread would be a great feature for dessert and coffee, a staple at day-after-Thanksgiving brunch or as a hearty after school snack. You could even get creative with any leftover slices (if you ever have them) - this would be a great base for a bread pudding with vanilla glaze or dipped in eggs and cereal crumbs for freezer-friendly French toast.

I think I'll go cut myself a slice now!


Chocolate Chip Pumpkin Bread
Adapted from Our Best Bites 

Ingredients: 

3 c all-purpose flour
2 t ground cinnamon
1/2 t ground nutmeg
1/4 t ground allspice
1 t baking soda
1 1/2 t baking powder
1 t salt
1/2 c brown sugar
1 1/2 c white sugar
6 oz. container plain or vanilla yogurt
3 eggs, slightly beaten
15 oz. canned pumpkin puree or 1 3/4 c homemade puree
1/2 c vegetable oil
1 t vanilla extract (use 1 1/2 if using plain yogurt)
1 c chocolate chips (plus more for tops of loaves)
raw sugar (for tops of loaves)

Method: 

Preheat oven to 350. Spray two loaf pans with non-stick spray.

Combine flour (reserving 1 T), baking soda and powder, salt and spices in small bowl.

Toss chocolate chips in small bowl with 1 T flour; this will prevent them from sinking in the pans.

In a mixing bowl combine sugars and whisk to remove lumps. Add yogurt, eggs, pumpkin, oil and vanilla. Mix until smooth.

Slowly add dry ingredients to wet and mix until just wet - do not overmix. Gently stir in chocolate chips and extra flour.

Divide batter between loaf pans and sprinkle with extra chips and raw sugar.  Bake for 45 minutes or until a toothpick comes out clean.

Allow to cool for 10 minutes on wire racks then run a knife around the edges and flip loaves onto rack.

To freeze: cool completely then store in freezer-safe bags or vacuum seal. Will last for several months in the freezer. Pull to room temperature or microwave lightly to thaw.

Review: Clean Eating Magazine

You already know that reading and cooking are my two biggest hobbies, and the pairing of the two just gets me giddy. I've already shared some of my favorite books, subscriptions and blogs that are helpful resources for cooking (and eating). I'm always looking for new tasty texts to try; in fact, my Christmas list features two food books ("Twelve Recipes" and "Eat More Better"). So, you can imagine my excitement when my mother lent me three copies of the relatively new magazine, Clean Eating.


J and I immersed ourselves in the clean eating cult.. uh.. culture this summer, with a two-week challenge courtesy of Buzzfeed. And we continued to try different recipes sticking to the "clean ethos" that food is best (and best for you) when free of fillers, preservatives and chemicals - meaning fresh fruits and veggies, lean/varied proteins, whole (often gluten-free) grains, limited dairy and all-natural sugars. Our challenge had some bumps in the road; remember the fennel massacre? But overall, we enjoyed experimenting with new foods and bold spices, and we learned new techniques and recipes that we still use. 

All of which made this magazine find all the more intriguing. Yet, it fell short of expectations.

I cannot say that I entirely hate the magazine. I actually love that each issue contains a two-week calendar of meals (breakfast, snack, lunch and dinner) employing a large variety of proteins, fruits/veggies and allows for bread, milk and cheese (Buzzfeed's diet was much more strict). Being on a schedule is helpful for me at work and even helps calm some of my lunch-packing rage. The portions were ample and I wasn't hungry during the day.

The remainder of the magazine included several themed recipe sections with beautifully styled color photos. Everything looked really appealing at first glance and some of it was truly beneficial and delicious.

Just look at some of the tasty food we made from the calendar plan:

Orange tamari glazed chicken thighs with carrots & leeks

Seared salmon with quinoa and garlic sautéed spinach

I used ingredients I've never considered before, like barley and leeks; made interesting combinations like an avocado caprese sandwich; and discovered new favorite products like Pepperidge Farms' Ancient Grains bread. 

But despite the yummy food and great visual aesthetic of Clean Eating, I can't say I enjoy it and would never pay money for an issue. 

Let it be known that I have a BA in English (writing) and was a contibutor and editor to our college publication, am an avid reader and currently subscribe to three food/cooking magazines. You can call me an expert witness in this case of Cohesive Accuracy VS. Disjointed Errors. 

First, there is little direction in the content of the mag and literal directions for some recipes. Food Network and Taste of Home magazines have monthly features; charming narratives; anecdotes about family, fun or parties; and insight on products, techniques or resources. I pore over these issues and have to force myself to not read them cover-to-cover in one siting. But CE,  there might be pages 1-2 lines about, say the benefits of root vegetables, then a series of recipes - some of which don't even include the featured ingredients. Or there are quarter-page articles followed by large ads. Useful content seems limited here.

I don't feel welcome in the world of Clean Eating; I don't feel like anyone is making an effort to sell this lifestyle to me in a way that explains why this might be enjoyable, delicious or do-able. Instead of an inviting publication that excites me to try new things or shows me that I can relate to their chefs and writers. I feel like this is a scrapbook - a collection of quirky recipes (like red velvet cake made of beets) torn from various sources and devoid of context or heart; which doesn't mean they aren't good recipes, but what convinces you to try them?

And if you do try them, I hope you have some culinary skills, or at least the gift of foodie inference. For example, look at this meal plan "recipe" for pepper pork chop:

In a baking dish, pour 2 tbsp chicken broh over 3 oz. pork chop, sprinkle with 1/4 t black pepper; bake. 
 Bake?!


At what temperature?!

For how long?!

At what internal temperature is pork safe to eat?!

I set my oven for 350 and baked for around 10 minutes until they were at 145 internally (which is actually an updated temp standard). But I know people who would crank it to 450 and "bake" until all the broth was evaporated and you were left with nothing but "pepper saw dust."

And of course, the pre-planned grocery lists for ONE include a disclaimer to double ingredients when cooking for two etc. but some of the scheduled recipes are for FOUR servings, so when doubled, you buy $30 of pork tenderloin that you don't need! Taste of Home relies heavily on reader submissions, but they then take every recipe to their test kitchen to perfect it. They make it over and over until all components are properly cooked, the method is accessible to home cooks and the expense is reasonable. Costly mistakes to the reader are inexcuseable, especially if you're trying to inspire home chefs to prepare and eat more healthy meals or convince them that a healthy diet won't break the bank.

I'll happily share some of my successful clean recipes here; but for now, I'd recommend exploring someone else's copies or perusing their (free) website instead of purchasing a subscription. Save your $6 per issue and the $30-worth of pork. 

Tuesday, October 7, 2014

"I Like Your Spice:" Chicken Tikka Masala

Tonight, I tried a new recipe based on a few of what I believe to be cooking truths:

  • The first weekend of truly chilly weather, deserves warm, comforting food
  • Cleaning out the freezer demands good casseroles, curries and stews
  • Garam masala should be made into perfume, it is so damn delectable
So, after finding a pack of boneless, skinless chicken breasts, I opted to try a recipe for tikka masala. We love Indian flavors (see note about garam masala, seriously, I'd dab that stuff behind my ears) and The Two Man Gentleman Band only helped to pique our curiosity!


Tikka masala, although it sounds incredibly exotic, isn't a particularly shocking dish, even for the wary eater. Don't listen to the myths that all Indian food is five-alarm spicy or will upset your stomach. What Indian food I've tried has been very flavorful - all sorts of flavors, sweet, spicy, herbaceous - and quite palatable.

If you enjoy warm stews, this recipe won't be far out of your comfort zone. The sauce is primarily made of tomatoes, so it's not unlike a thin, acidic pasta sauce. With the addition of less than a cup of heavy cream, it takes on a smoothness that evens the tartness of the tomatoes and helps cling to the hearty chunks of chicken. You can kick this recipe up with heat or tone it down, it's all really flexible because the major flavor components come from the garlic, ginger and garam masala, not the cayenne or raw peppers. For example, the original recipe called for a serano pepper (up to 23,000 on the Scoville heat rating) but we used a jalapeno (10,000 SHU at most) and it was still flavorful and hot. We even served ours with an extra dollop of yogurt, just in case; and you could certainly make a traditional Indian raita, too. 


Now let's talk about this infamous spice - garam masala. It's an Indian spice mixture, like "Italian seasoning," that is a mixture of coriander (the seed of cilantro, that thankfully doesn't have the same soapy dishwater flavor), cinnamon, black pepper and cardamom; but can include other spices like nutmeg, tumeric and cumin. All of the spices have a warmth to them as opposed to a fresh herbaceousness like thyme or rosemary. They don't have a heat to them, but a well-rounded earthy flavor.This mix smells like cooked food and just makes me feel warm and comfortable; to me this is the smell of a cold day outside but a busy day in the kitchen that fogs up the windows. 

But despite use of what might be my favorite spice blend, the most interesting part of this dish is the chicken preparation. After dry rubbing the chicken with spices and allowing it to rest, you dredge the chicken breasts in a yogurt sauce then broil it in the oven. This makes for such a tender piece of meat, permeated with flavors and with a smooth coating of creamy (heat fighting) sauce. I think I would employ this method in many other recipes, too; it's too quick, easy and delicious not to! 

Grab some warm naan and a bowl of jasmine or basmati rice and serve up a delicious meal for a cool fall evening! 

Chicken Tikka Masala
Adapted from Buzzfeed

Ingredients for the chicken tikka: 
1/2 t ground cumin
1/2 t ground coriander (or garam masala)
1/4 t cayenne pepper
1 t. salt
1-2 lb boneless, skinless chicken breasts, trimmed of fat
1 c. plain yogurt
2 T vegetable oil
3-4 medium garlic cloves, minced
1 T grated fresh ginger

Ingredients for the masala sauce: 
3 T vegetable oil
1 medium onion, finely diced
3-4 medium garlic cloves minced
1 chile, ribs and seeds removed (jalapeno, serrano etc. based on your heat level of choice)
1 T tomato paste
1 T garam masala (or make your own with 2 t ground coriander, 1/4 t cardamom, 1/4 t ground cinnamon, 1/2 t ground black pepper)
1/8 t cayenne pepper
2 t sugar
1/2 t salt
2/3 c heavy cream
1/2 c chopped cilantro, green onions or parsely

Method: 

Combine cumin, coriander, cayenne and salt in a small bowl. Sprinkle liberally onto chicken breasts, pressing the meat to make sure the spices adhere. Place on a plate, cover with plastic wrap and allow to rest in the fridge for 30-60 minutes. Meanwhile, whisk together yogurt, oil, garlic and ginger in a small bowl; set aside. 

Heat oil in a large pot over medium heat, add the onions and sautee - stirring frequently - until light brown. Add garlic, tomato paste, cayenne and garam masala; stirring frequently until spices "bloom" about 3 minutes. Add tomatoes, sugar and salt; bring to a boil and lower to medium-low heat, cover and simmer for 15 minutes, stirring occasionally. 

Adjust oven rack to upper-middle position (2nd rack position, 6" below broiler) and turn on broiler. Dredge chicken into yogurt mixture, covering it with a thick layer of sauce and arrange on a wire rack over a foil-lined baking sheet (for easy cleanup). Discard excess yogurt. Broil chicken until it registers 160 degrees at it's center and has lightly charred spots - 10-15 minutes, flipping chicken at the 5-7 minute mark. Remove chicken from oven and allow to rest for at least five minutes. 

After removing chicken from oven, add cream to the tomato sauce and return to a simmer. Then remove from heat. Cut chicken into 1 inch cubes and stir into sauce. 

Serve over rice and garnish with chopped cilantro, parsley or green onions. 


Tuesday, September 30, 2014

International Taste Test Courtesy of World Market

Living in the spectacular mountains of western North Carolina, fall is tourist season. We're  overrun with leaf lookers trying to take in our beautiful scenery and because of that, J's restaurant is impossibly busy. With the cooler temperatures and the changing colors, we had to jump on an opportunity for a date before the hellish rush of October and we went out on the town.

Our primary goal (besides spending time with each other) was to buy a couch for our new house, which we did. However, with home renovations and the purchase of said couch (and chair!) our date night budget was slashed. Yet, there are still inexpensive ways to have fun and not miss out on any adventures. 

While in Asheville, we went to one of our favorite stores - Cost Plus World Market. For those of you that have never been, World Market is exactly what it sounds like; a store filled with international treats of all sorts - including homegoods from a variety of countries, jewelry with cultural flair, and a plethora of foreign food items. They have niche cooking utensils and hardware - like North African tajines, hammered copper pots for curry, Oktoberfest beer mugs shaped like boots and more. But to me, the most exciting part of the store is the imported food and beverage department that is filled with all sorts of spices, candies, sauces, beers and wines from around the globe. Some of the items are fairly familiar, like Toblerone chocolate bars or Nutella; and some we've heard of but never tried, like vegemite or spotted dick, but the majority of items are (to me) completely foreign. 

And for foodies like us, that makes for a perfect date night stop! For less than $12 we both got several treats to try - that's cheaper than one movie ticket at some A-ville theaters. Aside from the finances of it, this trip was partly inspired by a series of Buzzfeed videos where they give a panel of staff members food/drinks from foreign countries or cultures. These videos are hysterical - partly because we're learning about random foods ourselves, like Japan's Every Burger wheat crackers or the infamously awful malort liquor; but that also it seems each panel has completely different responses, someone will inevitably love it, and others will be skeptical if not grossed out (except everyone hated Vegemite). 

This video was our main inspiration. I knew World Market carried the Ramune soda and I was dying to try it! 


Ramune soda comes in a glass bottle with two chambers - a large one at the base and a smaller one in the neck. To open the soda, you break the plastic cap to create a plunger, push the plunger down hard on the lid to force a marble into the smaller chamber. This creates a whole lot of fizz and a very satisfying glass-on-glass noise. Apparently, the marble serves no practical purpose other than stopping the flow of soda if it were to get overturned - but for some (childish?) reason, it's a whole lot of fun! 

We tried the "original" flavor, and if I am to go by the pictures on the bottle it is cigarette-smoking pig, melon, life preserver and Japanese lantern flavored...but I think that's inaccurate. It's got a very clean taste that is very simple; it reminded me of a very weak ginger ale or lightly sweetened seltzer water. J also got a strawberry Ramune - which appeared to be a very popular flavor at World Market. It was very tasty and quite sweet, not unlike the Southern Nehi drinks. There are over two dozen flavors of these sodas (we saw about six at World Market) and I'm certainly eager to try more! These would make great stocking stuffers, too (and WM is the place for one-off single serving treats for gifts). 


Also, J grabbed a bag of chocolate covered Turkish delight which was nothing short of disgusting. This appears to be a more traditional variety of the "delight" flavored with rosewater and according to the packaging, paprika (no, we didn't read the ingredients list prior to purchase.. damn). I bit into mine and immediately spit it out. J attempted to eat two or three pieces to isolate the ingredients, but to no avail. 

We also got a bag Walker's shortbread shaped like Scottie dogs (a favorite in our house); a Nutfulle hazelnut truffle, which tasted like a Ferrero Roche treat on steroids and a dark chocolate wafer cookie which you place atop your coffee cup to get warm and gooey, this was a hit for J despite his mega coffee cup trying to swallow the cookie whole.  


If you're a remotely adventurous eater or suffering a case of wanderlust on a budget, I highly suggest hitting up a World Market, specialty store or even the ethnic aisle of your local grocery store. You can find all sorts of interesting treats and even pre-packaged items to make unique international meals. 

If you're looking for a more regular culinary trip outside your comfort zone, I highly suggest signing up for a monthly subscription service. We highly enjoyed our Goodies subscription - which sent us a box filled with 8-10 snacks per month for $7 - until the company closed. There are many other food services that fill almost any niche and price range. For example, Plated ($60) offers all the ingredients to a gourmet meal, plus instructions, delivered straight to your door; Skoshbox ($12) and Candy Japan ($25) provide Japanese candies, snacks and "goodies" monthly; Tiffin Trove ($15) sends the Indian ingredients for a meal, all you have to purchase is the perishable items; and there are so many more - from gluten-free, to healthy, to wine-of-the-month! Like our shopping excursion, they can be hit-or-miss (hopefully no one sends you Turkish delight) but the thrill of a monthly mystery package and taste-test is a great experience. 

So, never suffer from food-travel FOMO (fear of missing out) - you can easily escape the mundane by a quick trip to the grocery store. Even buying one new item can open your horizons! 

Sunday, September 28, 2014

No Nonsense Chicken Enchiladas

You all know that after flavor, ease and expense are my highest priorities in food. And since we bought our house and moved, that has never been more true. Our kitchen is the only room that is unpacked and remotely functioning; but we are still scrambling to find all our utensils and have been slack grocery shoppers. With that being said, dinners have been quick and easy, and usually come in a bag - but I took the opportunity this weekend to cook a real meal, and make several meals for later, to be kept in the freezer.

A great way to save money, is to scour your grocery store for "reduced for quick sale" items. This is especially handy with packaged produce, like mushrooms and lettuce; dairy items and the biggest savings are in meat. If you're an astute shopper, you can easily figure out which days are flagged for restocking and reducing current inventory. Our favorite local store, Ingles, puts bright stickers on produce and bulk items and that's the first thing we look for. Grabbing deals like this can be hit or miss, and sometimes on impulse rather than need alone but they're real steals! Be especially mindful of items that freeze or dehydrate well.

The other day, I went to Ingles to get some breakfast items, and I walked past the meat cooler where almost three pounds of chicken thighs were on sale for less than $2. Did I need chicken thighs? No. But, I brought them home, cleaned and repackaged them in two-portion airtight containers and threw them in the freezer. I later used a pack for last week's chicken panang curry and thawed the remainder to make two batches of these chicken enchiladas.

With meat already on hand, the rest of the items are staples in our home, so this recipe is incredibly inexpensive and would be easy to make on a whim, too.

Since you're making the roll-ups yourself, this is a very economical way to make individual servings, servings for two or a family. I doubled the recipe, which normally makes eight enchiladas or four servings. But instead of making two batches of eight I cooked in a smart way that would give us the most meals with the least amount of waste - one batch of eight for when we had a couple of friends over and two batches of four that we could eat ourselves; we ate one 2-person batch that night and I froze the other 4-pack and the 8-pack. Eight servings or 3-4 meals for under $10!

I love that these enchiladas are hearty but without feeling heavy or over-dressed with cheese or sauce. I chop my chicken into big, rough chunks, which gives the filling a thickness and great mouth feel as opposed to some saturated with sauce and runny filling. The green chiles add a mild heat and sweetness and the cumin adds that traditional "taco" flavoring we all love. You could easily dress this up with more spices or even some roughly chopped cilantro (which I despise). Also, you can add other vegetables to the filling; the Progresso soups include black beans but if you had some extra sweet corn kernels, kidney beans, sauteed onions or mushrooms (look in your fridge for leftovers or the reduced section of the store) you could add 1/2 a cup or so to the filling, too!

The recipe only involves mixing up two different bowls of ingredients - one for "sauce" and one for filling, and actually rolling the enchiladas. It's that simple, which makes this a great recipe for little helpers. If you chopped the chicken, this whole dish could be made by your children. How much would they enjoy eating something they'd made?

I hope you're able to incorporate this meal into your own fiestas and family dinners!


Chicken and Cheese Enchiladas

Ingredients:
1 can (18.5 oz) Progresso chicken enchilada soup or southwestern vegetable soup
1/3 c sour cream
1 can (4.5 oz) chopped green chiles*
1 t ground cumin
2 c chopped cooked chicken
1 1/2 c shredded cheese
8 flour tortillas (corn works, too)

Method:

Pre-heat oven to 350. 

In a medium bowl, mix soup, sour cream, chiles and cumin. Pour 1/2 c soup mixture into ungreased 2 quart casserole dish for full serving (use smaller dishes if making smaller, freezable portions - 2 enchiladas per person). 

In another bowl, mix 1 c soup mixture with chicken and half of the cheese. 

Place 1/4-1/3 c chicken mixture in each tortilla. Roll up and place seam side down in the baking dish. Pour remaining soup mixture on top and sprinkle with remaining cheese. Cover dish with a piece of alumninum foil sprayed with nonstick cooking spray. 

Bake 30 minutes, remove foil and bake 5-10 minutes until cheese is melted and bubbly. Allow to rest at least 5 minutes before serving. 

If making to freeze: Only par-cook the enchiladas, about 15 minutes. Cool to room temperature then wrap with plastic wrap and foil to put in the fridge. When you want to cook it, pull it out the night before (so you'll have less reheat time) then cook at 350 for the final 15 minutes.

*You can use the canned green chiles, or roast your own if you have fresh peppers on hand. Green, sweet or red peppers would be good, but if you want to add heat add jalepenos or even something hotter! Toss your peppers on a baking sheet and place in a 500 degree oven. Cook until the skins are wrinkled and getting dark. Remove from the oven and throw them in a zip-top bag to steam, this will help the skin peel off, Rub them gently to remove the cooked skin. 

Monday, September 8, 2014

"Get Well" Panang Curry

My poor husband is sick. We thought his allergies were riled up from our recent new home renovation projects, but the sniffling has turned into coughing and a sore throat -- and now he's just pitiful. He's been curled up in our over-sized recliner with our "magic" (read: threadbare) blanket since last night. So today called for some serious get well food, beyond the Reese's cups I grabbed this morning, some real, homemade comfort food and I knew just the thing: panang curry.


If you've never had Thai food before or are intimidated by hot curries, this is a great place to start. The flavors are smooth and vibrant without being too spicy (heat or literal spice) and the ingredients are familiar, not foreign or off-putting (which also makes it easy shopping). Being filled with common vegetables and only a few non-pantry staples, you're able to ease out of the ordinary and into the extraordinary.

Unlike some curry dishes, which can be thick and almost gummy, this recipe uses two cans of coconut milk, making for an almost soup-like sauce that is creamy and sweet and perfect served over rice.   This thinner sauce allows the vegetables and meat/tofu to shine as solid, beautiful bites independently of the broth instead of being coated in one-note of flavor. Each of the bites is able to full of flavor and texture - which is made even better by large cuts, especially on the meaty mushrooms. Go as heavy as you want on the vegetables - the original recipe called for tiny quantities and I've increased them by almost half and it's still a thin broth with hearty vegetable pieces - you could even add more!


I first made this recipe last fall - following the original to the letter - but have since adapted it to our tastes and to my "use what's on hand" leftover philosophy. We both enjoyed the traditional, tofu preparation but carnivorous varieties are delicious, too! After last Thanksgiving, I used the overwhelming amount of turkey and have continued to experiment with it. Today, I thawed out two chicken thighs, boiled them in heavily salted water and pulled the meat off of the bone. But honestly, you could use almost any pre-cooked poultry cut (I wouldn't use ground meat) but leftover KFC or grilled chicken leftovers would be delicious!

In addition to being an easy trip to the grocery store (only panang curry paste might warrant a search in the "ethnic" aisle - an easier to find substitute is red curry paste, which is the main ingredient in panang curry paste anyway), this recipe is completely painless to cook - using only one pot and taking less than 30 minutes to complete. With good mise en place and prepping all of your vegetables and proteins ahead of time, this recipe literally requires two steps - browning the spices and dumping in everything else!


I don't think I have an easier international recipe in my arsenal and this curry certainly beats chicken noodle soup for curing any cold!

Panang Curry

Ingredients:

2 T vegetable oil
2 T chopped garlic
1 t grated ginger
2 T panang (or red) curry paste
2, 13.5 oz. cans coconut milk (FYI: I've tried this with light coconut milk and didn't enjoy it as much, but it's still good)
1 T palm sugar (or brown sugar)
1 t salt
1 T reduced sodium soy sauce
1 - 1 1/2 T lime juice
1/4 c roasted and unsalted cashews, roughly chopped (much cheaper when bought in the bulk dry goods aisle)
1 1/2 c quartered white mushrooms
1 c chopped white or yellow onion
4 Thai basil leaves (optional - these are hard to come by here, so you can easily nix them)
4 - 6 oz. cubed protein (raw, extra firm tofu or any precooked poultry cuts)
10 broccoli florets
1 cup chopped red bell pepper (these can be expensive, so don't hesitate to use cheaper, green peppers)
15 snap peas (strings removed)

Method: 

In a well-seasoned wok or heavy-bottom sauce pan, heat oil on medium heat. When hot, add ginger and garlic and sautee until light brown - don't let it brown too much or your garlic will be bitter.

Stir in curry paste. Whisk in coconut milk, sugar, salt, soy sauce and lime juice. Start with 1 T and add more to taste, it can be a bold flavor. Also, taste carefully for the salt; it doesn't take much but just a pinch brightens the flavor of every vegetable and the curry paste.

Add vegetables and proteins and simmer until tofu is cooked completely and vegetables are al dente (you can cook them softer if you'd like, but I prefer a bit of a bite).

Serve over warm rice, especially jasmine, and top with cashews and sriracha, if you like. And if you're a "dipper" like I am, this sauce is great soaked up by naan or spring rolls (we especially love Healthy Choice's Thai chicken spring rolls).


Sunday, August 10, 2014

A Moveable Feast - Dining on Carnival Sensation

As I've mentioned earlier, J and I recently took a cruise to the Bahamas with friends. We were on the Carnival Sensation for four days and had a fabulous time. This was the first cruise for all of us and we didn't know what to expect. I assumed we'd be taken care of - who would want to be trapped on a boat with 1,000 unhappy and/or hungry customers, and we'd heard all the tales of the never-ending food - my doctor told me to make sure we paced ourselves and some online reviews cautioned us to pack plenty of stretchy pants. 

Yet, I assumed the food would be fairly run-of-the-mill like any hotel continental breakfast; decent, filling, in excess and proportionate to the price of lodging, but nothing to write home about. However, I was very wrong. So wrong that I am, in fact, "writing home" to you, my readers, about the stellar fare on the ship. 

First, let me say that we spent around $450 apiece for our tickets. This included the price of our cabin (queen sized bed, bathroom, but no exterior window and all amenities therein), any activities we'd take part in or view (including game shows, pool/hot tubs/waterslides, George Lopez's comedy club, Vegas-style cabaret and more), entry into the international ports (Freeport Harbor and Nassau) and all travel costs including four days aboard the ship. I thought this price for these items alone was reasonable; especially considering that a beach-area (not even ocean-front) hotel - where you aren't likely to be murdered or get bed bugs - runs around $100/night.

However, the price is incredibly economical when you add in the value of the food available to you.

There are "levels" of tickets that include larger staterooms - with windows or balconies, and seating in the "signature" restaurants - including a steakhouse-style hotspot. These restaurants are available to those with "basic" level tickets, but include additional charges.

We purchased the base level of ticket and had the following dining options available to us at no additional charge:
    • Lido Deck Buffet - An outdoor buffet on the pool deck which serves  continental breakfast and made-to-order omelettes (7:00 a.m. - noon); lunch and dinner (noon - approximately midnight) with "grill" area hamburgers/hotdogs, rotisserie station and Mongolian wok
    • 24-hour dining room - which featured several round-the-clock stations including a daily international buffet (American, Carribbean, Mexican and French were served during our cruise), hand-tossed made-to-order pizza bar, deli, salad bar, sweet station with no less than six dessert options, soft serve ice cream/frozen yogurt machines
    • All-you-can-drink water, juice, milk, lemonade, iced tea, hot teas, coffee and hot chocolate at either location, available all day. 
    • Continental breakfast delivered a la carte to your room per order ticket hung on your door knob. 
    • 24-hour room service from a wide menu of fruits, sandwiches, salads and desserts.
    • And our favorite place, the Fantasy Dining Room, which served high-class, gourmet breakfasts (2+ courses) and dinners (3+ courses) in an upscale atmosphere. At each meal, we were offered a menu with 2-3 categories we could pick from - and if you wanted two desserts, three starters or one of EVERYTHING (yes, everything) they would bring it to you. Water, juice, milk, teas and hot drinks were available free-of-charge here during meals, too.
Being an almost-millennial with the FMO (Fear of Missing Out) and an old-school cheapskate, I wanted to get my foodie's money's worth and we certainly did. 

We got up early each morning to pack in as much food, er.. um.. adventure into each day and ate breakfast around 7 in the Fantasy Dining Room, had lunch with bits from both the Lido and 24-hour buffets around noon, a snack (usually a sweet) mid-afternoon before our naps, dinner at 7 in Fantasy and late night snacks (sometimes Hobbit-style second dinners) around 11.

But, I suppose, the best way to portray the quality, quantity and value of Carnival's spread, is to show you! 

We took pictures of a variety of the dishes we ate in the Fantasy Dining Room, that you'll see below. I was so impressed with not just the flavors, but the impressive plating. Each plate was well thought-out, they did  dramatic tableside presentations of all the chilled soups and used spot-on techniques/knife cuts for each element. In addition to showing you the beautiful plates, I am giving you a glimpse at how impressive of a deal this experience was - if you were to eat this quality of food (as often as we did) on vacation on-land, you'd be shelling out a pretty penny! You'll see in italicized parenthetical the cost of a comparable dish at a national franchise or supermarket. 

Here's a glimpse of what I ate last week: 
  • The breakfast I ate every day (and once at lunch) - smoked salmon bagel with cream cheese, capers and red onion. (At our favorite grocery store, Ingles Markets, 3 oz. of smoked salmon is $8 - so figure at least $24 dollars only on the protein)
  • Starter: seared duck breast salad with oranges; Main: grilled chicken breast with roasted vegetables; Dessert: warm chocolate melting cake (Molten lava cakes run $6.29 apiece at Chili's Bar & Grill franchises; J and I ate at least $30 worth of those things).
  • Starter: Indian spiced pumpkin soup; Main: broiled lobster tail with grilled shrimp; Desserts: Grand Marnier souffle and banana creme cake (An oven roasted lobster tail plus one vegetable side at Red Lobster runs $30.99)
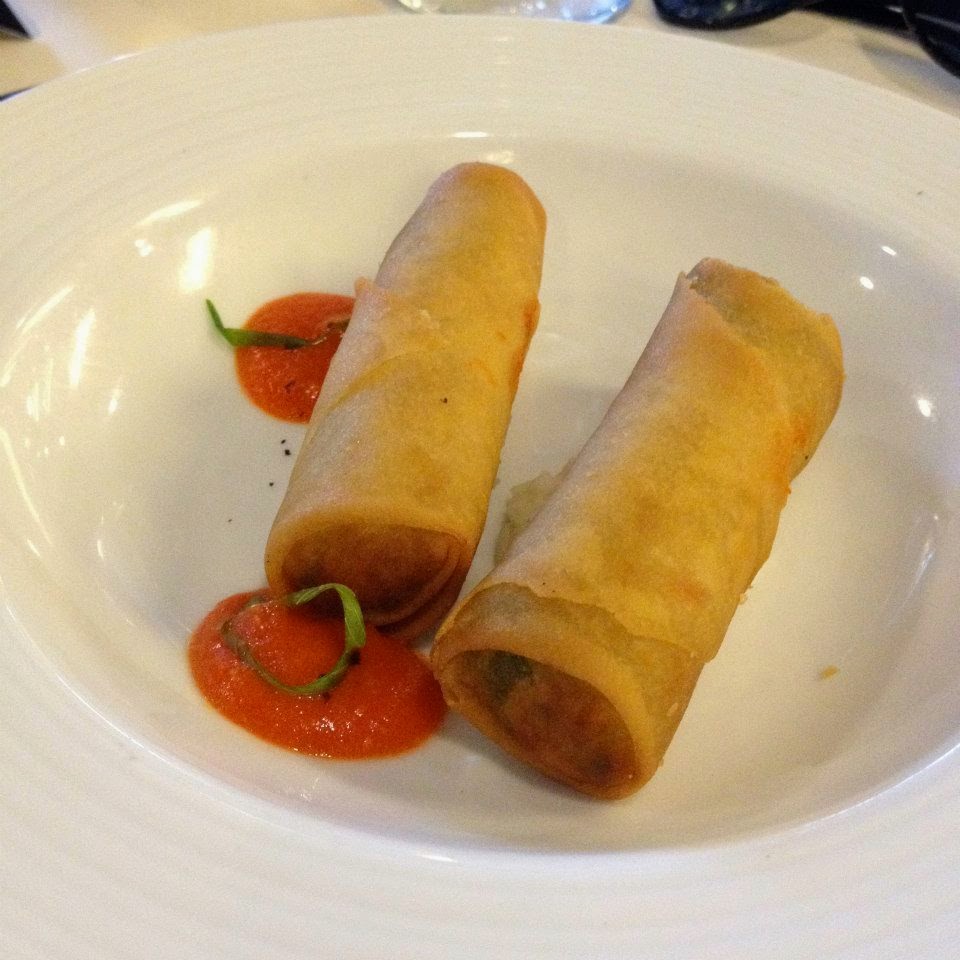
  • Starter: fresh vegetable spring roll; Main: flat iron steak with vegetables; Desserts: tiramisu and banana creme cake. (Olive Garden's tiramisu is $6.29 per serving; and that's only one of my desserts...)


  • (Sea Day Brunch) Starter: tropical fruit plate with cottage cheese; Main: bacon macaroni and cheese -- Alas, no pictures. We left our phones in the room; which is really disappointing because the plating for the fruit was top-notch!
  • Starters: A "study in sushi" and chilled asparagus vichyssoise; Main: veal parmigana; Dessert: baked Alaska. (A comparative veal dish at Romano's Macaroni Grill clocks in at $23).


And here's a look at J's meals:
  • J ordered eggs benedict every morning except our first, when he had a waffle with a stewed banana in a dulce de leche caramel. 
  • Starter: hot spinach artichoke dip; Main: flat iron steak with vegetables; Dessert: warm chocolate melting cake. (Applebee's spinach artichoke dip appetizer is $7.99 and TGI Friday's flat iron steak runs close to $15.00)


  • Starter: alligator fritters; Main: broiled lobster tail with grilled shrimp; Dessert: warm chocolate melting cake

  • Starter: shrimp cocktail; Main: "gourmet burger" with fries; Dessert: cappuccino ice cream cake (Olive Garden's chocolate ice box cake is around $6.50).


  • Starters: A "study in sushi" and crab cake' Main: veal parmigana; Dessert: warm chocolate melting cake. (A crab cake sandwich with one cake at Joe's Crab Shack is $10.79).


Not be forgotten as a contributor to the value, is the amazing service we received in the Fantasy Dining Room. Carnival prides itself on "getting to know" everyone cruising - our room steward, Richard, addressed us by name and Alvin, a waiter in the various bars sought us out by name - and they do the same in the dining room. They would ask "Amanda, how is your meal?" or "Robert, would you like more coffee?" The dinners took longer because of the ceremony of ordering each course individually and receiving drinks and breads, but it was worth it because we were so well taken care of. And each evening we were a part of "Showtime" with the Maitre'd where the waiters and servers would dance and sing for the dining room.

I mentioned another perk earlier: the free  room service available 24/7 (minus soda and alcohol orders). Neither of us have ever had the privilege of ordering from a room service menu, and now after knowing how "the other half lives," I can see the allure. The ship provides complimentary terry cloth robes for each room and I must say there's nothing quite like drying off from the pool, throwing on an over-sized, fluffy robe and eating from a covered dish in bed. We ordered on two different occasions - once we each got sandwiches from the deli, and the other we got salads and sweets. The food was nothing short of delicious; it was of the same quality as any of the dining rooms including great plating (see that snazzy cheesecake with piped whipped cream and strawberry puree?) and attention to detail (like my Caesar salad which was tossed to order, not with bottled dressing but the real deal eggs and anchovies stuff). 


I thoroughly enjoyed our trip and was utterly spoiled (and maybe fattened) by the terrific food on our cruise. Honestly, I have struggled the past few days with not eating every two hours and having to shop for, cook, plate and clean up after our meals. This shock of coming back to reality has further confirmed that cruising is the way to travel. Everything is done for you - you just have to get up and walk to eat or a see a show (which after eating and being lulled to sleep can be hard) - and there isn't any of the "where do you want to eat/I don't know where do you want to eat" arguing. If you're looking for a vacation, seriously consider cruising, especially with Carnival; we're already thinking about our next trip (to the buffet).