Sunday, May 25, 2014

Clean Eating Detox: Day 1

Today is the first day of our two-week clean eating challenge and so far, we're off to a great start! 

Each day of the detox features a breakfast, lunch, daytime snack, dinner and nighttime snack. Day 1's menu included: 

We had a banana-kale smoothie with almond milk, raw almond butter and vanilla extract for breakfast. It was different my idea of a smoothie because it wasn't overwhelmingly sweet like many commercial smoothies made with flavored yogurt or ice cream, and it had a gritty texture from the kale, opposed to a smoother, fruit and dairy-heavy drink. But the flavor is great and doesn't taste like a cliche "health-food." And it was a huge portion and kept me full for a long time. This eased my big fear that we are doomed to starve to death on this diet. 


For lunch we had a shaved asparagus salad with shallots and fried eggs. Again, this was another substantial dish that filled me up - and I couldn't even eat it all! We eat salads fairly frequently but never like this! I've never shaved asparagus or added fried eggs to salads and it was delicious. Also, the dressing was just lemon juice and it added a surprising complexity. My only complaint was that there was way too much tomato (which I don't like to begin with) which made the salad almost too big and watery; next time I'd only use half a tomato per salad. We will be making this again for sure!


One of our two snacks was three medium-sized carrots cut into matchsticks with 1/4 c of hummus. I was so full from lunch that I actually didn't eat mine and J found it to be almost too many carrots to eat. 


For dinner we made several "big batch" recipes that will continue to be used throughout the week, including quinoa, steamed kale, roasted chicken breast and orange vinaigrette that were tossed together. This was an excellent entree; another "make again" dish for sure. We had feared that this dish might be flavorless and bland, but it wasn't! The chicken is cooked bone-in, skin-on with only salt and pepper but you allow the seasoned chicken to rest for 30 minutes before cooking and the flavors actually soak in quite well. The quinoa (which we'd never tried before) was perfectly salted and the vinaigrette added lots of acidic, garlic flavor, too! 


As our nighttime snack, we each had a thinly sliced pear with 2 T of raw almond butter. I was skeptical of this - I like pears but almond butter looks a whole lot like paper mache paste, a poor substitute for peanut butter. But it was delicious! It isn't nearly as sweet or smooth as peanut butter but it's texture and subtle sweetness paired perfectly with the pears (or licked right off the plate as I just caught J doing). 


Day 1 synopsis: We've been pleasantly surprised by the flavors and quantity of food in these recipes. My hunger worries are, so far, unfounded. However, we did realize how literally addicted we are to sugar. J's been bemoaning the utter lack of cookies and ice cream in the plan and I'd love to sneak a bite of leftover Easter candy, myself. And the no-coffee rule is already taking it's toll on my husband. Even on a stress-free Sunday, he's dragging without his big mug of coffee. We are technically allowed to have up to three cups of unsweetened green tea, but really who wants to drink that? 

There are also two kitchen observations we made today. The cooking doesn't take an excessive amount of time but you do need to be organized and have your thoughts and plans straight - so don't worry. However, you will go through some dishes! Thankfully, we have used some of our less-frequently-utilized kitchen tools - like our new mandolin and juicer - but have had to run a load through our dishwasher and hand washed two sinks-worth more! 

And in the words of the detox's origin, Buzzfeed - complete with motivational gif; 

"You made it through Day 1 of the Challenge. Way to go!"


Saturday, May 24, 2014

Our Clean Eating Detox: Day 0 Observations

Because we are pursuing a healthy lifestyle and love to try new things and/or are masochists, J and I are starting a Clean Eating detox tomorrow.

Clean eating is a premise we've flirted with some in our cooking, and find exceptionally intriguing. We recently had a conversation with a friend about how little legitimate food we are actually eating. As a society - if not an global era - we are eating more processed, refined food-like products rather than actual, unadulterated fruits, vegetables, proteins and grains.

Just look at the ingredients on the back of this snack pack of animal crackers. I bought them because they were inexpensive and in a low-calorie serving, but then the ingredients were pointed out to me.

Gotta love the typo too... 
Although clean eating diets do combine elements of several "trendy" diets - low carb, gluten-free, organic - it's based on the solid principal of cooking and eating ingredients that are as close to their natural state as possible. So the summer Cookout shake binge is on hold, but the recipes we're working with for the next two weeks look pretty great.

The detox is a plan we found on Buzzfeed - the black hole into which all 20-somethings fall and lose hours on end - and is thoroughly planned out. Seriously, we're talking 53 pages of menus, FAQs, equipment (paltry) and grocery (insurmountable) lists. The cleanse lasts 14 days and is planned where several "big batch" dishes are made that will be served in several meals so they've scheduled everything perfectly - even the Saturday prep days, what to pack in your lunchbox, how to store it,  and freezer packs with "when to thaw" instructions. Each day includes breakfast, lunch, a day snack, dinner and a night snack. Only a  few of the recipes repeat - only breakfasts and snacks - so it's a ton of variety.

The variety makes for an impressive fortnight menu that's heavy on the veggies and fruits, fatty proteins like nuts and fish, and white meats, but not light on flavor. For example: Day 5 includes a cauliflower omelet, quinoa and blueberry salad with lime and mint, carrots and hummus, salmon with green beans and lentils and blueberries with almonds.


We start our clean eating adventure tomorrow, so today was spent shopping and doing prep - and it was quite an educational undertaking.

First, I'd like to say that the pre-planned grocery lists are very heavy on the first week - so you can do freezer packs and make dishes late in the week, with leftovers continuing into Week 2. With that being said, List 1 had over 60 items on it -- only a few of which we had on hand at our house, spices mostly (Week 2 has 30+). So one of our first lessons was that clean eating is...expensive! 

The plan is designed for one person, so we had to double everything (quite a math struggle - especially with some units/ingredients "quart container of basil"??) and that pushed our bills (yes, bills, more on that later) even higher. Look at the sheer amount of food we had to purchase.
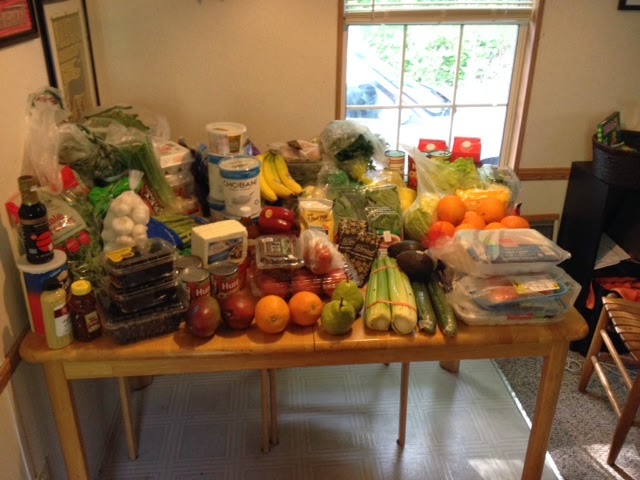
For perspective - this table seats two full-sized chairs per side. We thought we'd have to use the leaf to hold all the food!
This haul included, but was not limited to: 128 oz. plain Greek yogurt, 24 oz. feta cheese, 24 oz. 70% cacao dark chocolate, 4 red bell peppers, 2 lbs. spinach ...


8 oranges, 2 oz. fresh mint, 64 oz. unsweetened plain almond milk, 20 oz. bone-in, skin-on chicken breast; 20 oz. fresh salmon, 20 oz. ground turkey, 4 bulbs of fennel, 2 seedless English cucumbers...


a bottle of Tamari (gluten-free soy sauce), 6 bunches (12 c.) of kale, 53 eggs (for both weeks, thank goodness), 28 carrots and so much more!


Certainly not the way to an efficient fridge... 
I won't throw out a number, but let's just say that this shopping trip was at least three times more expensive than our regular weekly, to bi-monthly trips - and this was just food, no toiletries, cleaning supplies, home goods included!

We did try to remind ourselves that this is every scrap of food we will be eating for a solid week (and then some) - we won't be making stops at the store on the way home after those "what do you want for dinner" conversations where we end up buying way too many things for one night, but not enough to satisfy the rest of the week's meals and we won't be going out to eat AT ALL.
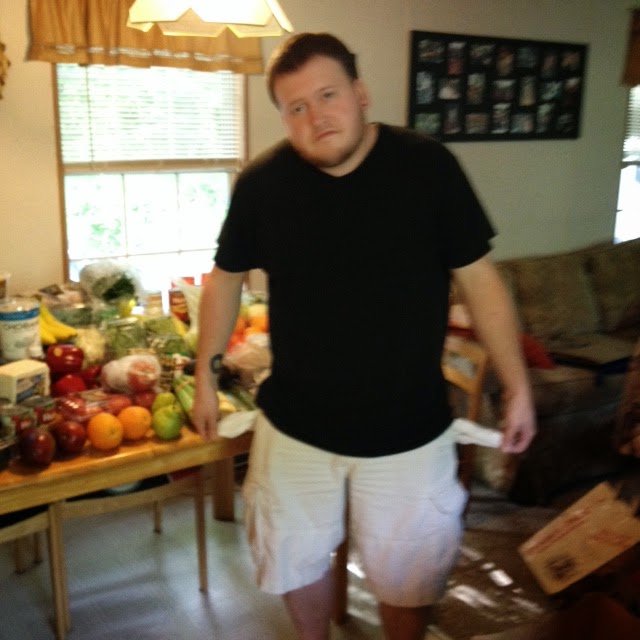
J: "60 grocery items and not an Oreo in the bunch..."
But still, this is a cost-prohibitive menu for many; I know we couldn't do this year-round. I"m a bargain shopper - I will go from store to store and back looking for the best deal (we did that today to J's chagrin) and I was struggling to find products with suitable price tags. For example, at Harris Teeter I could hardly find any non-organic foods. They were all farm raised, free-range items that were at least 10% more expensive than their (absent) counterparts normally are.

And that's one of the biggest issues with food insecurity and health in the US. Fresh, unprocessed (read:good for you) food is much more expensive than junk food. While begrudgingly shopping (it went from fun to tiring quickly), we talked about how although it wouldn't be nutritious and certainly would lose it's deliciousness quickly, a loaf of bread, jar of peanut butter and some lunch meat would help a paycheck or SNAP (food stamps) go much further. And if you're in a tight spot, sometimes choosing between the dollar menu and organic produce has to be a choice about money.

Many areas are fighting this trend; farm gleaning projects bring fresh produce to food pantries, neighborhoods are starting community gardens and co-ops, and buying local CSAs provide reliable and less expensive produce, but in many places, these projects don't exist.

Which brings me to my next point. Clean eating is...potentially geographically biased. Another major issue with food disparities in the US is the undeniable presence of food deserts. Food deserts are places where "fresh produce is scarce and greasy food abounds." Think of big cities where the only sources of "groceries" are corner markets that are cramped and filled with non-perishable, processed items or rural areas where grocery stores are difficult to reach, especially without owning a car. This is a reality for many people and we were very aware of this while shopping. We actually drove an hour to Asheville where we knew we could find all of the ingredients we needed, and even then had to go to over four stores. There were many items we were skeptical about finding, and especially finding in good quality, quantity and pricing in our hometown. We stopped at our local grocer on the way home for goods we knew they'd have (at great prices) and saw some of the things we thought required a trip to Trader Joe's or Earthfare, but that isn't the reality for everyone.

Here are some of the items we didn't think we would find (or find affordable) in our town - quinoa, chia seeds, ground flaxseeds, tamari and medjool dates.


From the shopping trip alone, we can tell that this detox may also be... time consuming. There will be considerably more prep-time required as opposed to making Hamburger Helper or picking up a pizza. And while that can be another disadvantage for the working class, this detox plan does offer very detailed instructions for multi-tasking and make-ahead meals and freezer pouches.

But, so far, I can say my overwhelming feeling about clean eating is...excitement.  I do not doubt this will have challenging moments: some of these foods are not my cup of tea, and speaking of tea, J is already dreading going without coffee and only being allowed three cups of unsweetened green tea per day; and I think I may struggle with hunger. Yet, I'm still excited to try new things. I can honestly say that I've never made any of these recipes before and without the menu would never buy 30% of these items .


I think it's going to be fun, delicious, and most importantly, good for us!

Buzzfeed promises we'll feel like this when it's over..


We'll certainly share pictures of our moods - and dance moves - throughout the process! Stay tuned!

Tuesday, May 20, 2014

Summer Slaw

It's summer time which means we have more time to spend outside - playing bocce or just sitting on the deck - ergo, I want to spend less time inside cooking when I could be soaking up the sun! So this recipe is a quick one that's perfect for nights when you're in a rush to get to rec league softball or vacation Bible school, want to savor the sunlight or your kitchen is just too damned hot.

I say my dad "invented" this broccoli slaw, only because he's the only person I've ever seen make it; personally, I didn't know pre-packaged broccoli slaw mix even existed. But since he first made this, I've been hooked!


It's a great side dish, but my favorite way to serve it is on top of tacos - especially fish tacos.

For anyone who hasn't tried fish tacos: get with it! They are delicious. Admittedly, I was skeptical at first, too. My first drinking (and alcohol poisoning) experience was after eating a whole mess o' catfish and I never looked at fish (or the store whose sidewalk I besmirched) the same. However, fish tacos can be made from almost any fish, or even shrimp, and are a much more light, delicate and to me, summery take on a Mexican favorite. Sometimes tacos can really weigh you down; just the toppings alone - refried beans, sour cream, cheese (cheddar or cotija), salsa and more - can fill you up. And personally I hate to feel super full in the sweltering heat. Fish, white fish varieties especially, are lighter proteins to begin with and they don't need as much dressing up. Lemon juice, a dash of hot sauce (we're a devout Cholula family) and broccoli slaw do the trick!

The broccoli slaw is incredibly easy and only five ingredients. First, you need a bag of broccoli slaw mix; which may be the most ingenious food product in years. I love broccoli, but usually only find florets raw at salad bars or cocktail parties with ranch dip; so what happens to all of the raw " broccoli trees"? They are sliced into tiny shreds for broccoli slaw! And they have the most amazing texture - it's airy and weightless. When you bite through a broccoli tendril it's like no food texture I've ever felt! A little slaw goes a long way, especially when you're cooking for two, so start with half of the bag - it's easy to whip up more, if when seconds are needed.

Next, add a glob of mayonnaise, or  for a healthy sub stirred, plain Greek yogurt. This is all about consistency and texture. I like my slaw more on the veggie side - not the sauce-heavy-side. So I start with about a tablespoon of mayo, stir it in and see how well it coats. You really only want a light (almost non-existent) coating on the slaw to help all the components stick to each other - and to add that trademark bitter zing of mayo.

Add a squeeze of lemon juice (I start with a tsp.) and a handful of chopped dried cranberries and a handful of (shelled) sunflower seeds. This step lends itself well to pantry-panic. If you're out of cranberries, add raisins (PRO TIP: if they're particularly crusty and hard, soak them for about 3 minutes in warm water and dry on paper towels, they'll plump right up!); for the sunflower seeds - which we almost NEVER have - you can sub any nut. I used chopped pecans last night, but we've used walnuts before, too. The crunch is necessary!

It's that easy!

The flavors merry so well together. The broccoli itself has a very subtle flavor since it's cut into such small, airy pieces, so the other ingredients can really shine. Lemon juice brings an acidic brightness that pairs well with the mayonnaise and the cranberries pop the whole dish. Their signature tart sweetness livens your tastebuds; while the buttery, earthy nuttiness of the sunflower seeds grounds you again. All of these flavors are perfectly in sync and play well to the subtlety and butteriness of white fish.

Our fish tacos - rolled up; and a buffalo chicken tostada (more on that later in my Buffalo'd special)

For the other taco components last night, we used a whole wheat tortilla (flour and corn work too - but be advised, corn tortilla sizes are limited) and a Gorton's fish filet. I know we'd make Betty Draper proud with our use of breaded "fish sticks" - but you really could use any fresh or frozen fish. Grilled pollock, flounder and of course, catfish are great in these.

Friday, May 16, 2014

Fat Kid Friday: Classic Yellow Cake

For our second installment of Fat Kid Friday, I'm bringing you the delicious, ridiculously tall and rich yellow cake I made for J's birthday.


J's family loves birthdays - they get together for EVERY family member's birthday and there's store bought cake and ice cream and chips every time. I have always been a cake person, but this new, almost monthly serving of birthday cake has increased my love of cakes. This year, I started asking J what kind of cake he wanted early on and while leafing through my "Martha's American Food" cookbook he pointed to a beautiful yellow four-layer cake with chocolate buttercream.

This cake was an undertaking - not because the recipe was hard but it was such an exquisite cake to live up to. And it was a whole hell of a lot butter. But - despite it being a messy, butter-filled endeavor - this cake tastes like childhood. It tastes like the cakes mom and grandma used to make. My grandma makes the best yellow cake with a thick fudge icing. I remember peeling off the fudge and either shoveling it down as fast as I could or saving it for the very last bite (this patience came with age). This cake is a close second to that with a creamy smooth frosting and a sweet, buttery (duh!) cake.

And this recipe makes more than enough icing. I saved some in the fridge and it's an exact replica of Ice Cube candies (if you've never tried one, hit up your local retro candy store, like Mast General Store).

I highly suggest you stocking up on butter and whipping this up for your next special occasion!

Fun Tip: LEGO minifigures make the perfect candle holders!
Just sit them on a little piece of tinfoil so they don't get icing in their legs. 


Yellow Layer Cake with Chocolate Icing

Cake Ingredients:

1 cup (2 sticks) unsalted butter, plus more for pans
1 1/2 c all-purpose flour, plus more for pans
1 1/2 c cake flour (not self rising, I used Swan's Down)
1 T baking powder
1/2 t salt
1 3/4 c sugar
4 large eggs
2 t pure vanilla extract
1 1/4 c milk

Method:

Pre-heat oven to 350. Butter two 8x2" cake pans, line bottoms with parchment. Butter parchment and dust with flour, tap out excess (TIP: if you're making a chocolate cake use cocoa powder to dust your pans).

Sift together flours, baking powder and salt into a medium bowl.

With an electric mixer on medium speed, cream butter and sugar until pale and fluffy. Beat in eggs, one at a time, then beat in vanilla. With the mixer on low speed, add the flour mixture in three batches, alternating with the milk and beginning and ending with the flour, beat until combined after each addition.

Divide the batter between the pans and smooth with a spatula. Bake, rotating pans halfway through until tops are tender and a toothpick comes out clean (this is a delicate cake that's easy to over-cook, watch them closely) - about 30 minutes. Let cool in pans on a wire rack for 20 minutes. Run a knife around the edges and flip onto rack. Let cool completely, top sides up.

Using a serrated knife or bakers garrote trip tops of the cake to make level. Split each cake horizontally to make four layers. Place bottom layer on a serving platter and spread with frosting. Place another cake layer on top, spread with frosting. Repeat twice. Spread a thin - crumb coat - on the entire cake, refrigerate until firm. Spread with a final layer of frosting. Refrigerate cake at least 1 hour until slicing. (Cake can be made up to 3 days ahead. Cover and refrigerate; let sit at room temperature before slicing and serving).

Icing Ingredients:

1 1/2 lbs semisweet chocolate, finely chopped
1/2 c plus 1 T unsweetened cocoa powder
1/2 c plus 1 T boiling water (great use of the Keurig!)
1 lb plus 4 T (4 1/2 sticks) unsalted butter, softened
3/4 c powdered sugar
pinch of salt

Method:

Heat chocolate in a double boiler, stirring occasionally until completely melted - about 15 minutes. Remove from heat and let cool to room temperature, 25-30 minutes. Meanwhile combine cocoa and boiling water, stir until cocoa is dissolved.

With an electric mixer on med-high speed, beat butter, sugar and salt until light and fluffy. Add melted chocolate, beat on low speed until combined - 1 or 2 minutes. Beat in cocoa mixture.

Saturday, May 10, 2014

Quick Picnic Hack


Here's a quick and easy way to make your picnics and parties easier!


To corral all your utensils or condiments, use a cardboard drink caddy. Make sure the bottom isn't fully open or add a piece of tape to the edge and fill the compartments with your items of choice. This makes setting a table super easy and keeps your utensils from sitting on the ground or dirty picnic table. It's also easy to carry and transport. Win!


Fat Kid Friday: Pound (of butter) Cake

"I love you like a fat kid loves cake" - 50 Cent, "21 Questions" 

I'm (belatedly) starting a feature of decadent, rich and calorie-filled dishes for Fat Kid Friday. I try to offer a variety of healthy, quick-and-easy meals here but this feature will give you wonderful ways to treat yourselves with uber-delicious and sinfully satisfying dishes - a lot of these will be desserts since we both have big sweet tooths but I've got a few luxurious entrees.

Here's our first installment with a wonderful, traditional Southern pound cake recipe from Martha Stewart's "Martha's American Food" (a new cookbook favorite of mine).

The best recipes are on the dirty, sticky pages! 

According to my dad, one of the best things I've ever cooked was pound cake. I started making them using an ancient church cookbook (those are always the best!) and even got confident enough to start making my own twists on the classic recipes. Dad loved when I'd mix in Hershey's syrup to make a yummy, dense marbled cake.

When I got this new cookbook, I decided to try another traditional pound cake recipe and this one is certainly a winner. It's so traditional that it still sticks very closely to the "pound" recipe - calling for a pound of sugar, a pound of flour and of course, an entire POUND of butter and nine large eggs. This is certainly no recipe for those counting calories, trying to lower their cholesterol or avoid diabetes.

Pound cakes are incredibly versatile and come in many varieties. The old-school recipes are heavy on extracts - extra vanilla, lemon, orange or even the mythical "five flavor pound cake." I, myself, love plain, run-of-the mill pound cakes. Our local supermarket chain, Ingles, makes the best original version. It's dense and soft - like a heavy duty angel food cake - and is incredibly delicious warm and smeared with peanut butter. I grew up calling it choke butter cake because without a glass of milk, you literally struggle to swallow the sweet bites.

The basic version of this recipe is delicious and very lightly flavored. You can taste the subtle vanilla, but what stands out the most to me is the hint of salt. The tablespoon of coarse salt really adds a great contrasting flavor. Pound cake straddles the line between bread-y, almost muffin-like texture and that of cake-cake. This recipe is more on the bread-like side, with a good bite and mouth-feel. And yes, it is still delicious with peanut butter (or Nutella or Biscoff cookie butter). It is also the perfect base for macerated berries (with vanilla sugar!) or a warm sundae.


And the variations are just as good, if not better! So far, I've made it with fresh blue berries and a blackberry jam swirl (below) - and both are gone in a flash!

All of the recipies - original and variations - are incredibly easy. The hardest parts are waiting for the butter and eggs to get to room temperature and dividing the batter evenly - you could use a kitchen scale here, I suppose, but I just wing it (for better or worse).

Pour yourself a glass of milk and put on your stretchy pants to enjoy this wonderful Fat Kid Friday pound cake!

Pound Cake

Ingredients:

1 pound (4 sticks) unsalted butter, softened*
3 1/4 c all-purpose flour
1 T coarse salt
2 c sugar
1 t pure vanilla extract
9 large eggs, room temperature, lightly beaten*

* It is CRITICAL that the butter and eggs be at room temperature, if not the batter will look curdled and will the cake will be far too dense and won't rise properly.

Method:

Preaheat oven to 325. Lightly butter two 5x9" loaf pans.

In a medium bowl, whisk together salt and flour.

With an electric mixer on high speed, cream butter and sugar together until light and fluffy. Cream them thoroughly for the best volume. Scrape down the sides of the bowl. Reduce speed to medium and add vanilla.

Add the eggs in four batches, mixing thoroughly and scraping the bowl after each addition. Reduce speed to low and add flour mixture in four batches. Mix until just incorporated.

Divide batter between pans. Tap pans on the counter twice to distribute evenly. Bake until a toothpick entered into the center comes out clean - about 1 hour. Allow to rest on a wire rack for 30 minutes. Run a sharp knife around the edges of cakes, then turn out cakes onto racks to cool completely.

Variations:

Blueberry-Sour Cream -  Use 1/2 c sour cream in place of 1 stick of butter. Toss 2 c fresh blueberries w. 2 T flour (this keeps them from sinking to the bottom of the loaf); fold into finished batter. Before baking, sprinkle 2 T sanding sugar (I use demerara - raw- sugar) over each cake.

Jam - Fold 1 c jam into the finished batter.


Monday, April 14, 2014

Must-Have Kitchen Tools

Food Network Magazine did an interesting feature this month where big-name chefs did shout outs about some of their favorite ingredients. Normally on cooking shows, labels are distorted or fake labels are affixed to cans so as to not show preference (read: lose advertisers). But in this article, they were able to dish on their favorite name brands of everything from salt to olive oil to cookies.

I wanted to take a page out of their magazine (pun totally intended) and give you some of my favorite, name brand kitchen tools. I have a long list of things that every cook needs in their kitchen, but here are a few products whose brand-specific details and quality I endorse and would encourage you to bring into your homes.


Ninja Master Prep food processor - I got this as a fluke from my grandmother who buys practically everything QVC's "In the Kitchen With David" has to offer. It's a set of 4 blender "cups" or "pitchers" with multiple blades. You can set up each cup/pitcher with the associated blade(s) and plunk the motor on and off with ease. This thing does everything! The only food processor task I wouldn't trust to it would be making dough for pastas or pie - I think the cups are too narrow and it would glob up easier. I use this frequently to make sure my purees and soups are silky smooth.


Kitchen Aid Artisan Series stand mixer - The green apple stand mixer was our one big ticket item on our wedding registry and we were beyond thrilled when we found out it had been purchased. I was so excited to get it home and add this wonderful pop of color and practicality to our countertop. It came with three mixing attachments - a whisk, a paddle and a dough hook, stainless steel bowl and splatter guard. We've used it to make whipped creams, cookies, cakes and bread dough. It is so useful and so beautiful. I'm really excited to buy more attachments too - I'd love to try out the pasta maker and I've used my parents' meat grinder attachment to make my own, healthier ground chicken. My only complaint is that it can sometimes be too big to make servings for two - I can't make half a cup of whipped cream because the bowl is too big and the whisk doesn't reach the cream! However, if you want to make sure you can avoid that, you could get the Professional 600 grade which has a moveable bowl that can lift up higher to do small jobs.


Rachael Ray hard anodized cookware - There are some pieces of cookware that no matter how careful you are, how mindful you are of seasoning and greasing your pots and pans you will continue to burn food and have stuck-on messes to clean up. However, sometimes you find a cookware line that no matter what you do to it, cooking and cleaning are a breeze! They come in great sizes that fit perfectly on the burners and have easy-to-hold handles which are oven safe up to 400 degrees. We received these at a wedding shower, just in time because our best nonstick pans were totally worn out. We've used this set for over six months and they don't show any age on them at all. I will say that we've been trying to take very good care of them when cleaning - hand washing only - but when cooking, we've been pretty rough on them, as rough as two foodies would be; but they still look brand new!


Keurig K45 Elite brewing system - J, a coffee freak, would probably say that this was the best gift we've received. Despite my love of coffee ice cream, I cannot stand the taste of hot coffee, but even I have found our Keurig handy. They are so convenient - water stays hot and you can have any drink within 30 seconds, and the K cups come in almost any flavor and variety - from a million coffees to cocoa to cider, tea and more. It's also helpful for me in recipes that require small amounts of hot water - like instant potatoes or some homemade icings.


Pyrex or Temp-tations containers - I refuse to buy unitasking kitchen items - like avocado slicers - why take up cabinet space with something that only does one stupid thing?! Pyrex and Temp-tations containers are so incredibly useful because they're microwave, oven and freezer safe. I love making freezer-friendly meals   and these dishes make that so much easier. I can pre- or par-cook my meals in the oven and then immediately pop them into the freezer. They're easy to stack and store and keep our foods safe and freezer-burn free. I love that the Pyrex dishes are see-thru so I can easily tell what's in there (I label everything with masking tape, too). But one of the biggest selling points of Temp-tations is that they are adorably decorated with hand painted designs, so you can go from oven to freezer to oven to table and they look beautiful and most sets come with trivets and carrying baskets, too!

Now, I have to know - what kitchen tools and you not live without?